Of course! Here is a comprehensive guide to Java Mission Control (JMC), covering what it is, why it's essential, how to use it, and best practices.

What is Java Mission Control (JMC)?
Java Mission Control is a powerful, all-in-one profiling and monitoring tool for the Java Virtual Machine (JVM). Think of it as a highly advanced cockpit for your Java applications, providing deep, real-time insights into their internal state, performance, and resource consumption.
Originally developed by Oracle as a standalone product, JMC was bundled directly with the Oracle JDK starting with JDK 7u40. For OpenJDK builds (like those from Amazon Corretto, Eclipse Temurin, or Microsoft Build of OpenJDK), you typically need to download it separately as an add-on.
Key Features
JMC is not just a simple CPU profiler. It's a suite of tools that work together to give you a holistic view of your application's health:
-
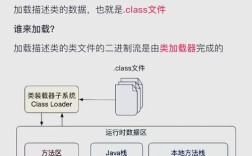
Flight Recorder (JFR): This is JMC's crown jewel. JFR is a low-overhead, event-based recording and monitoring framework built directly into the JVM. It can capture detailed information about the JVM and the application running inside it with minimal performance impact (often less than 1-2%).
 (图片来源网络,侵删)
 -
JMX Console: Java Management Extensions (JMX) is a standard for managing and monitoring Java applications. JMC provides a user-friendly interface to connect to any MBean server, view attributes, invoke operations, and subscribe to notifications.
-
Memory Profiler: Helps you analyze memory usage, identify memory leaks, and understand object allocation patterns.
-
Thread Profiler: Visualizes thread states, lock contention, and CPU usage over time, helping you find concurrency bottlenecks.
-
System and I/O Monitoring: Provides graphs and statistics on CPU usage, disk I/O, network I/O, and paging.
 (图片来源网络,侵删)
 -
Code Browser: Allows you to inspect the loaded Java classes, methods, and their metadata.
Why Use JMC? The Problem It Solves
Imagine your Java application is experiencing one of these common problems:
- High CPU Usage: It's slow, and you don't know which part of your code is to blame.
- Long GC Pauses: The application freezes periodically for several seconds.
- Memory Leak: It runs fine for hours but eventually crashes with an
OutOfMemoryError. - Poor Performance: It's just not as fast as you expect, but you can't pinpoint the reason.
Traditional tools like jstack (for thread dumps) or jmap (for heap dumps) are powerful but have limitations:
- They are often point-in-time snapshots. By the time you analyze the dump, the problem might have passed.
- They can be invasive and cause performance degradation during capture.
- They require manual execution and interpretation.
JMC solves these problems by:
- Providing continuous, low-overhead monitoring. You can record for minutes or hours without significantly impacting your application.
- Allowing you to record a "flight" while the problem is happening and then analyze it later.
- Offering a rich, graphical interface that makes it easy to correlate events (e.g., "This GC pause happened right after this allocation spike").
How to Use JMC: A Step-by-Step Guide
Step 1: Installation and Setup
Scenario A: Using Oracle JDK
If you have an Oracle JDK (version 7u40 or later), JMC is likely already included in your installation directory, typically under jdk/jmc/.
Scenario B: Using OpenJDK (Amazon Corretto, Eclipse Temurin, etc.)
- Download the JMC add-on from a reputable source. The official GitHub repository is a good choice: https://github.com/openjdk/jmc
- Download the latest release zip file.
- Unzip it to a directory of your choice. This is your JMC installation directory.
Step 2: Configure Your Application for JFR
To use Flight Recorder, your application needs to be running with a JVM that supports it and with the correct flags.
Enable JFR on Startup:
You need to add the -XX:+UnlockCommercialFeatures flag (for Oracle JDK) or simply -XX:+UnlockDiagnosticVMOptions and -XX:+UnlockCommercialFeatures (or just -XX:+FlightRecorder for newer OpenJDK versions) to your JVM startup command.
# Example for a Java application
java -XX:+UnlockDiagnosticVMOptions -XX:+UnlockCommercialFeatures -XX:FlightRecorderOptions=defaultrecording=true,disk=true,dumponexit=true,path=./jfr-dumps/app.jfr -jar my-application.jar
Key JFR Flags:
-XX:+UnlockCommercialFeatures: Unlocks commercial features (required for Oracle JDK).-XX:+FlightRecorder: Explicitly enables Flight Recorder.-XX:StartFlightRecording: Starts a recording immediately on startup.name=MyRecording: A name for the recording.duration=60s: How long to record (ormaxsizefor a file size limit).filename=./my-recording.jfr: The file to save the recording to.settings=profile: Use a predefined "profile" template (more on this later).
For a Running Application: If you can't restart your app, you can connect JMC to it if it has JMX enabled (which is often the case for application servers).
# Add these flags to your running application
-Dcom.sun.management.jmxremote.port=9010
-Dcom.sun.management.jmxremote.authenticate=false
-Dcom.sun.management.jmxremote.ssl=false
Step 3: Launch JMC and Connect
- Navigate to your JMC installation directory.
- Run the
jmcexecutable (.shon Linux/macOS,.exeon Windows). - You will see the JMC Connection dialog.
- Local Process: To profile a local application, select it from the list.
- New Connection: To connect to a remote application via JMX, enter the host and port (e.g.,
service:jmx:rmi:///jndi/rmi://localhost:9010/jmxrmi).
Step 4: Record a Flight (Using JFR)
- Select the application you want to profile.
- Click the "Start Flight Recording" button (the red circle icon).
- A dialog will appear. You can:
- Choose a Template: This is the easiest way. Templates pre-select a set of relevant events.
- Default: Very low overhead, basic JVM information.
- Continuous: Low overhead, continuous monitoring.
- Profiling: Higher overhead but captures detailed application-level events (method profiling, allocations, garbage collection details). Use this for deep-dive performance analysis.
- Customize: You can manually enable/disable specific event types if you know exactly what you're looking for.
- Choose a Template: This is the easiest way. Templates pre-select a set of relevant events.
- Click "Start". JFR will now be recording data from your application.
Step 5: Analyze the Recording
Once you've captured the data you need (either by letting it run for a set time or by stopping it manually), JMC will open the Flight Recorder Browser. This is where the magic happens.
The browser is organized into several views, accessible via tabs on the left:
- Summary: A high-level overview of the recording, including GC time, CPU usage, and the top causes of performance issues. It's a great place to start.
- Events: A table of all captured events. You can filter, sort, and search. This is useful for finding specific problems like garbage collections, thread contention events, or exceptions.
- Threads: A graphical view of thread activity over time. You can see which threads were running, waiting, or blocked, making it easy to spot contention.
- Memory: Shows memory allocation, garbage collection activity, and object allocation histograms. This is your go-to for memory leak analysis.
- Code: Shows CPU hot spots by method. It lists the methods that consumed the most CPU time during the recording, with call trees to show how they were invoked.
Example Workflow to Find a CPU Hot Spot:
- Stop the recording.
- Go to the "Code" tab.
- Sort by "Self Time" (CPU time spent directly in the method, not in its callees).
- You'll likely see a method like
com.myapp.service.DataProcessor.calculate()at the top. - Double-click the method to see a call tree, showing you exactly what methods it called and how much time was spent in each.
Best Practices and Tips
- Start with a Template: Don't try to understand all 200+ JFR events at once. Use the
DefaultorContinuoustemplate for monitoring and theProfilingtemplate for targeted problem-solving. - Minimize Overhead: The
Profilingtemplate is great but has higher overhead thanContinuous. Use it only when you