Of course! Using Python with Abaqus is one of the most powerful ways to extend and automate your finite element analysis workflows. This practice is often called "Scripting for Abaqus" or using the Abaqus/Python API.
Here’s a comprehensive guide covering what it is, why you should use it, the core concepts, and how to get started.
What is Abaqus/Python?
Abaqus/Python is a built-in programming interface for the Abaqus FEA software. It's not a separate program you need to install; it comes with Abaqus/CAE.
- The Language: It uses the standard Python 3 language.
- The API: Abaqus provides a rich library of Python modules (often called the "API" or "Toolkit") that allow you to control every aspect of Abaqus.
- You can create geometry, define materials, assemble parts, apply loads and boundary conditions, mesh the model, submit jobs, and even post-process the results.
- You can also automate repetitive tasks, create custom graphical user interfaces (GUIs), and write complex analysis procedures that are difficult or impossible to do through the standard Abaqus/CAE interface.
Why Use Python with Abaqus? (The Benefits)
| Benefit | Description |
|---|---|
| Automation | Run the same analysis with different parameters (e.g., varying load, material property, or dimension) without manually clicking through the GUI. This is perfect for parametric studies and design optimization. |
| Repeatability & Reproducibility | A script is a perfect, repeatable record of your analysis setup. Anyone (or you, six months from now) can run the script to get the exact same model. This is crucial for research and validation. |
| Batch Processing | Submit multiple jobs to run sequentially or in parallel on a compute cluster, maximizing the use of your hardware resources. |
| Customization & Advanced Functionality | Implement custom material models, define complex load histories, or create custom analysis procedures that go beyond the standard Abaqus features. |
| GUI Creation | Build your own custom tools and graphical user interfaces (using the qt module) to simplify complex workflows for yourself or your team. |
| Integration | Python's vast ecosystem of libraries allows you to integrate Abaqus with other tools. For example, you can use NumPy for numerical calculations, Matplotlib or PyVista for advanced plotting, or pandas for data handling. |
The Core Abaqus/Python Objects (The "Mindset")
When scripting, you're not just writing Python code; you're manipulating a hierarchy of Abaqus objects. Think of it as building a digital representation of your FEA model in memory.
The key is to understand the parent-child relationships. For example:
- A
mdb(Model Database) object contains one or moremodels. - A
modelobject containsparts,materials,steps, etc. - A
partobject containsfeatures(like sketches, extrusions). - A
featureobject hasgeometry.
Here are the most important object types:
| Object | Description | Analogy in Abaqus/CAE |
|---|---|---|
mdb |
The Model Database. The top-level object that holds all the models in your session. | The entire .cae file you're working on. |
model |
An Abaqus analysis model. Contains all the components (parts, materials, steps, etc.) for a single analysis. | A single model within your .cae file (e.g., "Model-1"). |
part |
A geometric part. Can be 3D, 2D, or wire. | The Part module. |
material |
A material definition, including properties like elasticity, plasticity, etc. | The Property module. |
section |
A section definition that assigns a material and geometry to a part region (e.g., solid, shell, beam). | The Property module. |
step |
An analysis step (e.g., Static, General, Dynamic Explicit). | The Step module. |
assembly |
The instance of your part(s) in the analysis space. You can have multiple instances of one part. | The Assembly module. |
interaction |
Defines interactions between bodies or within a body (e.g., contact, tie constraints). | The Interaction module. |
load |
Defines loads (forces, pressures, etc.) and boundary conditions. | the Load module. |
job |
A job object that defines the analysis to be run. It links a model to an execution procedure. | The Job module. |
odb |
Output Database. The object used to read and post-process results from an .odb file. |
The Visualization module. |
How to Get Started: A Simple Step-by-Step Example
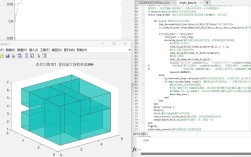
Let's create a simple script that builds a basic 3D cantilever beam, applies a load, and submits a job.
Step 1: Find the Scripting Interface Recorder
The easiest way to generate a script for a standard workflow is to use the built-in recorder.
- Open Abaqus/CAE.
- Go to File > Run Script.
- In the "Macros" dialog, click "Create...".
- Give your script a name (e.g.,
create_beam.py) and save it. - A new window will appear. Click "Start Recording".
- Now, go through your desired workflow in Abaqus/CAE:
- Create a 3D deformable part.
- Sketch a simple rectangular beam.
- Create a material (e.g., Steel).
- Create a solid section and assign it.
- Create an assembly instance.
- Create a Static, General step.
- Apply a fixed boundary condition to one end.
- Apply a concentrated force to the other end.
- Create a mesh (structured hex elements).
- Create and submit a job.
- Once finished, go back to the recorder window and click "Stop Recording".
You now have a complete, commented Python script that does everything you just did!
Step 2: A "From Scratch" Script
Here is a simplified version of what that generated script might look like. You can run this directly from a Python interpreter or as a script file.
# ==============================================================================
# Abaqus/Python Script: Simple Cantilever Beam Analysis
# Description: Creates a 3D beam, applies BCs and a load, and submits a job.
# ==============================================================================
# 1. IMPORT THE ABAQUS/Python MODULES
from abaqus import *
from abaqusConstants import *
from caeModules import *
# 2. GET A HANDLE TO THE MODEL DATABASE (mdb) AND THE CURRENT MODEL
# This is the standard starting point for almost all scripts.
mdb = session.mdb
model_name = 'BeamModel'
if model_name in mdb.models.keys():
    # If the model already exists, delete it to start fresh
    mdb.Model(model_name).delete()
model = mdb.Model(name=model_name, modelType=ANALYSIS)
# 3. CREATE THE PART
# A 3D, deformable, solid part.
part = model.Part(name='BeamPart', dimensionality=THREE_D, type=DEFORMABLE_BODY)
# Create a base feature (a solid extrusion)
sketch = model.ConstrainedSketch(name='beam_sketch', sheetSize=10.0)
# Draw a rectangle
sketch.rectangle(point1=(0, 0), point2=(10, 1))
# Extrude the sketch to create a 3D solid part
part.BaseExtrude(sketch=sketch, depth=1.0)
# 4. CREATE MATERIALS AND SECTIONS
# Define a material with elastic properties
material = model.Material(name='Steel')
material.Elastic(table=((200.0e3, 0.3),)) # Young's Modulus in MPa, Poisson's Ratio
# Create a solid section and assign it to the entire part
section = model.HomogeneousSolidSection(name='BeamSection', material='Steel', thickness=1.0)
part.SectionAssignment(region=part.Set(name='all', cells=part.cells), sectionName='BeamSection')
# 5. CREATE THE ASSEMBLY
# Create an instance of the part in the assembly
assembly = model.rootAssembly
instance = assembly.Instance(name='BeamInstance', part=part, dependent=ON)
# 6. CREATE STEPS, LOADS, AND BOUNDARY CONDITIONS
# Create a static, general step
model.StaticStep(name='Step-1', previous='Initial', timePeriod=1.0, maxNumInc=100)
# Apply a boundary condition (fixed end)
# Select the face at x=0
face = instance.faces.getSequenceFromMask(mask=('[X1]'), internalSets=ON)[0]
assembly.Set(name='FixedEnd', faces=face)
model.DisplacementBC(name='FixedBC', createStepName='Step-1', region=assembly.sets['FixedEnd'],
                     u1=SET, u2=SET, u3=SET, ur1=SET, ur2=SET, ur3=SET)
# Apply a concentrated load (force at the free end)
# Select the face at x=10
face = instance.faces.getSequenceFromMask(mask=('[X2]'), internalSets=ON)[0]
assembly.Set(name='LoadedEnd', faces=face)
model.ConcentratedForce(name='AppliedLoad', createStepName='Step-1', region=assembly.sets['LoadedEnd'],
                        cf2=-1000.0) # Apply a -1000 N force in the 2 (Y) direction
# 7. MESH THE MODEL
# Assign a mesh control
model.PartitionCellByPlaneAngle(part=part, angle=5.0)
# Seed the part
part.seedPart(size=0.5, minSizeFactor=0.1)
# Generate the mesh (using structured hex elements)
part.generateMesh()
# 8. CREATE AND SUBMIT THE JOB
job = mdb.Job(name='BeamJob', model=model_name, description='Cantilever beam analysis')
# Submit the job to the queue
job.submit()
# Wait for the job to complete (optional, but useful for scripts)
job.waitForCompletion()
print("Script finished successfully. Job 'BeamJob' has been submitted.")
Essential Resources for Learning
-
Abaqus Documentation (The Bible):
- Abaqus Scripting User's Manual: This is the most important resource. It contains a complete reference for every object, method, and function in the Abaqus API. It's your go-to for looking up syntax and functionality.
- Abaqus Keywords Manual: When you script, you are essentially generating the Abaqus input file (
.inp) behind the scenes. This manual explains the meaning of all the keywords that appear in that file, which is crucial for understanding the physics of your model.
-
Abaqus Community:
- The official Abaqus Community Forum is an invaluable place to ask questions and search for solutions from other users.
-
Books and Online Courses:
- "Abaqus Python Scripting" by G. R. Liu & S. S. Quek: A good dedicated book on the topic.
- "The FEA Handbook" by I. O. Smith: While not exclusively about scripting, it has excellent sections on automating FEA with Python.
- Online platforms like Udemy or Coursera often have courses on Abaqus scripting.
-
Example Scripts:
The best way to learn is by reading and modifying existing scripts. Look for examples on the Abaqus Community forum or GitHub. Start with simple ones and gradually increase complexity.