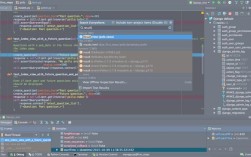
Of course! Let's dive into using Python with the Spyder IDE to create Graphical User Interfaces (GUIs).

Spyder is an excellent choice for GUI development because it's an Integrated Development Environment (IDE), not just a code editor. This means you get:
- A powerful code editor with syntax highlighting and autocompletion.
- An interactive console to run your code and see results instantly.
- A variable explorer to inspect your objects and data structures.
- An explorer for your files.
- A help pane for documentation.
This integrated workflow is fantastic for debugging and understanding how your GUI components and their data interact.
Which GUI Library to Use in Spyder?
You can use several Python GUI libraries in Spyder. Here are the most popular ones, with a recommendation for beginners.
| Library | Pros | Cons | Best For... |
|---|---|---|---|
| Tkinter | - Built into Python (no installation needed) - Simple and fast for basic apps - Excellent for learning GUI concepts |
- Looks dated (default "Aqua" or "Win32" theme) - Can be cumbersome for complex layouts |
Beginners, simple utility apps, quick prototypes. |
| PyQt/PySide | - Professional, modern look and feel - Extremely powerful and feature-rich - Great for complex, large-scale applications |
- Steeper learning curve - Requires installation of a large library ( pip install PySide6) |
Professional applications, complex desktop software, data visualization dashboards. |
| Kivy | - Cross-platform (Windows, macOS, Linux, Android, iOS) - Designed for novel UIs and multi-touch |
- Not native-looking on desktop - Smaller community for desktop apps |
Mobile apps, multi-touch applications, creative UIs. |
| Dear PyGui | - Extremely fast and easy for data visualization - Modern, immediate-mode GUI paradigm |
- Different paradigm from traditional GUIs - Still relatively new |
Rapid prototyping of dashboards, data plotting tools, and scientific visualizations. |
Recommendation for this Guide: PySide6 (or PyQt5/6)
While Tkinter is the "simplest," PySide6 (the official Python binding for the Qt framework) is the most powerful and widely used library for professional desktop applications. It strikes a great balance between ease of use and power, and its Qt Designer tool is a massive help for creating layouts visually.

We will focus on PySide6 in this guide because it's the most likely to meet your needs as you move beyond simple examples.
Step-by-Step Guide: Creating a Simple GUI with PySide6 in Spyder
Let's build a simple application that has:
- A window with a title.
- A label.
- A line edit box for the user to type their name.
- A button.
- When the button is clicked, it will display a personalized greeting in a message box.
Step 1: Install PySide6
First, you need to install the library. Open the Anaconda Prompt (or your system's terminal) and run:
pip install PySide6
If you are using the Anaconda distribution, you can also use:

conda install -c conda-forge pyside6
Step 2: Create a Basic Window in Spyder
Open Spyder and create a new file (File > New File). Let's start with the absolute basics to ensure everything is working.
# Import the necessary modules
import sys
from PySide6.QtWidgets import QApplication, QWidget
# 1. Create the application instance
# QApplication manages the GUI application's control flow and main settings.
app = QApplication(sys.argv)
# 2. Create a main window (a QWidget is a basic empty window)
window = QWidget()
window.setWindowTitle('My First GUI')
window.setGeometry(300, 300, 250, 150) # x, y, width, height
# 3. Show the window
window.show()
# 4. Start the application's event loop
# The app.exec() call starts the event loop, which waits for user interaction (like clicks).
sys.exit(app.exec())
How to Run It in Spyder:
- Make sure your "Editor" tab is active with the code above.
- Press the green "Run" button in the top toolbar (or press
F5). - A new window should pop up!
You will see the output in the IPython Console at the bottom. The GUI will be running there. To stop it, you need to close the GUI window.
Step 3: Add Widgets (Label, Line Edit, Button)
Now let's add the interactive elements. We will also create a "slot" function that gets called when the button is clicked.
import sys
from PySide6.QtWidgets import (QApplication, QWidget, QLabel,
                                QLineEdit, QPushButton, QVBoxLayout, QMessageBox)
# A function to be called when the button is clicked
def show_greeting():
    """This function is a 'slot'. It's connected to the button's 'clicked' signal."""
    name = name_input.text()  # Get the text from the line edit
    if name:
        QMessageBox.information(window, "Greeting", f"Hello, {name}!")
    else:
        QMessageBox.warning(window, "Warning", "Please enter your name.")
# --- Main Application Setup ---
# 1. Create the application instance
app = QApplication(sys.argv)
# 2. Create the main window
window = QWidget()
window.setWindowTitle('Simple Greeting App')
window.setGeometry(300, 300, 350, 200)
# 3. Create the widgetslabel = QLabel("Enter your name:")
name_input = QLineEdit()  # A single-line text box
greet_button = QPushButton("Greet Me!")
# 4. Create a layout and add widgets to it
# A layout manager automatically handles the positioning and resizing of widgets.
layout = QVBoxLayout()
layout.addWidget(title_label)
layout.addWidget(name_input)
layout.addWidget(greet_button)
# Set the window's main layout
window.setLayout(layout)
# 5. Connect the button's 'clicked' signal to our 'show_greeting' slot
# This is the core of event-driven programming.
greet_button.clicked.connect(show_greeting)
# 6. Show the window and start the event loop
window.show()
sys.exit(app.exec())
Explanation of New Concepts:
- Widgets:
QLabel,QLineEdit, andQPushButtonare all basic UI elements. - Layout (
QVBoxLayout): Instead of manually placing widgets with coordinates (which is inflexible), we use a layout.QVBoxLayoutstacks widgets vertically. This is crucial for creating responsive interfaces. - Signal and Slot: This is a key concept in Qt.
- A signal is emitted by a widget when a particular event occurs (e.g., a button is
clicked, a text box'stextchanges). - A slot is a function that you want to be called in response to a signal.
- We connect them using
button.clicked.connect(my_function). When the button is clicked, theshow_greetingfunction is automatically executed.
- A signal is emitted by a widget when a particular event occurs (e.g., a button is
Run this code in Spyder. You should now have a functional GUI!
Advanced Tip: Using Qt Designer
Manually writing layouts with code can be tedious. Qt Designer is a visual tool that lets you drag and drop widgets to create a .ui file, which you can then load into your Python script.
Open Qt Designer:
- From your Anaconda Prompt:
designer - Or, find it in your Anaconda Navigator under the "Environments" tab (it might be in the "Libraries" section).
Design a Form:
- Open Qt Designer.
- Choose "Main Window" and click "Create".
- Drag and drop widgets from the "Widget Box" onto your form. For example, add a
QLabel, aQLineEdit, and aQPushButton. - Use the "Lay Out Horizontally" and "Lay Out Vertically" buttons to arrange them.
- Save the file as
greeting_ui.uiin the same folder as your Python script.
Load the .ui file in Python:
You'll need a helper function to convert the .ui file into Python code. PySide6 provides a command-line tool for this.
In your terminal, run:
pyside6-uic greeting_ui.ui -o greeting_ui.py
This creates a greeting_ui.py file.
Now, modify your main script to use this generated UI:
import sys
from PySide6.QtWidgets import QApplication, QMessageBox
from greeting_ui import Ui_MainWindow  # Import the generated UI class
# Your slot function remains the same
def show_greeting():
    name = ui.name_input.text() # Access widgets through the 'ui' object
    if name:
        QMessageBox.information(window, "Greeting", f"Hello, {name}!")
    else:
        QMessageBox.warning(window, "Warning", "Please enter your name.")
# --- Main Application Setup ---
app = QApplication(sys.argv)
# Create the main window
window = QWidget() # Or QMainWindow if you chose that in Designer
ui = Ui_MainWindow() # Create an instance of the UI
ui.setupUi(window) # Set up the UI on the window
# Connect the button's signal
ui.greet_button.clicked.connect(show_greeting)
window.show()
sys.exit(app.exec())
This approach separates the design (.ui file) from the logic (Python code), making your projects much cleaner and easier to manage as they grow.
Summary
- Spyder is a fantastic IDE for developing Python GUIs due to its integrated tools.
- PySide6 is a powerful and modern library for creating professional-looking applications.
- Widgets are the building blocks of your GUI (buttons, labels, etc.).
- Layouts (
QVBoxLayout,QHBoxLayout, etc.) are essential for arranging widgets responsively. - Signals and Slots are the mechanism for making your GUI interactive.
- Qt Designer is a visual tool that dramatically speeds up the UI design process.