Of course! Using the Ace Editor in a Python application is a common requirement for building web-based code editors, IDEs, or online learning platforms. Since Ace is a JavaScript library, you'll typically use it within a Python web framework.

The most popular and straightforward way to do this is with Flask, a lightweight Python web framework.
Here’s a complete guide on how to integrate Ace Editor into a Python Flask application.
Core Concept: The Client-Server Model
- Server (Python/Flask): Runs on your machine. It's responsible for rendering the initial HTML page and can handle backend logic like saving files, running code, or validating syntax.
- Client (Browser/JavaScript): The user's browser runs the Ace Editor. It handles all the text editing features—syntax highlighting, autocompletion, line numbers, etc.
The Python code doesn't "run" Ace directly. Instead, it serves the necessary files (HTML, CSS, JS) to the browser, which then executes the Ace code.
Step 1: Project Setup
First, let's set up a basic Flask project.
-
Install Flask:
pip install Flask
-
Create Project Structure: Create a new folder for your project. Inside it, create the following files and a subfolder:
ace-flask-project/ ├── static/ │ ├── css/ │ └── js/ ├── templates/ │ └── index.html └── app.pystatic/: This folder will hold static assets like CSS and JavaScript files that Flask will serve.templates/: Flask automatically looks for HTML files in this folder.app.py: Our main Python application file.
Step 2: Get the Ace Editor Files
You need to include the Ace library in your project. The easiest way is to download the "Ace" package from its GitHub repository.
- Go to the Ace Editor GitHub page: https://github.com/ajaxorg/ace-builds
- Click on the green "Code" button and select "Download ZIP".
- Unzip the downloaded file. You will find a
src-min-noconflictfolder. - Copy the entire
src-min-noconflictfolder into your project'sstatic/directory and rename it toacefor simplicity.
Your project structure should now look like this:
ace-flask-project/
├── static/
│   ├── ace/          <-- The Ace library files are in here
│   │   ├── ace.js
│   │   ├── mode-python.js
│   │   ├── theme-monokai.js
│   │   └── ... (many other files)
│   ├── css/
│   └── js/
├── templates/
│   └── index.html
└── app.py
Note on Ace Files: For a smaller initial load, you only need to include the core files and the specific modes/themes you want. For this example, we'll keep it simple and include the whole package. In a production app, you would optimize this.
Step 3: Create the Python Flask Application (app.py)
This file will set up a simple web server that renders our editor page.
# app.py
from flask import Flask, render_template
app = Flask(__name__)
@app.route('/')
def index():
    # This function renders the index.html template
    return render_template('index.html')
if __name__ == '__main__':
    # Runs the app on http://127.0.0.1:5000
    app.run(debug=True)
Step 4: Create the HTML Template with the Editor (templates/index.html)
This is where the magic happens. We'll create a <div> that will become our editor and use JavaScript to initialize Ace inside it.
<!-- templates/index.html -->
<!DOCTYPE html>
<html lang="en">
<head>
<meta charset="UTF-8">
<meta name="viewport" content="width=device-width, initial-scale=1.0">Ace Editor in Python Flask</title>
<!-- 1. Link to Ace Editor CSS -->
<link rel="stylesheet" href="{{ url_for('static', filename='ace/ace.css') }}" type="text/css" charset="utf-8">
</head>
<body>
<h1>Python Code Editor</h1>
<div id="editor" style="height: 500px; width: 100%; border: 1px solid #ccc;"></div>
<!-- 2. Link to Ace Editor core JavaScript -->
<script src="{{ url_for('static', filename='ace/ace.js') }}" type="text/javascript" charset="utf-8"></script>
<!-- 3. Initialize the editor -->
<script>
// Find the editor div
var editor = ace.edit("editor");
// Set the editor's mode to Python
editor.session.setMode("ace/mode/python");
// Set the editor's theme
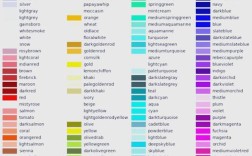
editor.setTheme("ace/theme/monokai");
// Set some initial code
editor.setValue(`# Welcome to the Python Editor!
def hello_world():
"""A simple function to print a greeting."""
print("Hello from the Ace Editor!")
# Let's call it
hello_world()
# Try writing some Python code below...
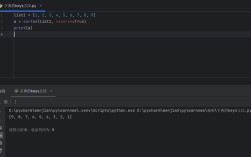
my_list = [1, 2, 3, 4, 5]
print(f"The sum of the list is: {sum(my_list)}`);
// Optional: Set the editor to read-only
// editor.setReadOnly(true);
</script>
</body>
</html>
Explanation of the HTML/JS:
- CSS Link:
ace/ace.cssprovides the basic styling for the editor (scrollbars, gutters, etc.). - JS Link:
ace/ace.jsis the core of the editor. We useurl_for('static', ...)which is the Flask way to generate URLs for static files. - Initialization Script:
ace.edit("editor"): This finds the<div id="editor">and turns it into an Ace editor instance.editor.session.setMode("ace/mode/python"): This is crucial. It tells Ace to apply Python-specific syntax highlighting, indentation, and code intelligence.editor.setTheme("ace/theme/monokai"): Sets the color scheme. You can try others likegithub,tomorrow, etc.editor.setValue(...): Sets the initial content of the editor.
Step 5: Run the Application
You're all set! Go to your terminal, navigate to the ace-flask-project directory, and run the Python script:
python app.py
You should see output like this:
 * Serving Flask app 'app'
 * Debug mode: on
WARNING: This is a development server. Do not use it in a production deployment.
Use a production WSGI server instead.
 * Running on http://127.0.0.1:5000
Press CTRL+C to quit
 * Restarting with stat
 * Debugger is active!
 * Debugger PIN: ...
Now, open your web browser and go to http://127.0.0.1:5000. You will see your fully functional Python code editor!
Going Further: Getting Content from Python
A common next step is to get the code the user has written in the editor and send it to the Python backend. You can do this with a simple form and JavaScript.
Update index.html
Add a button and a form. We'll use JavaScript to submit the editor's content when the button is clicked.
<!-- Add this to your index.html body -->
<h2>Submit Your Code</h2>
<form id="code-form" action="/submit" method="post">
    <input type="hidden" id="code-content" name="code" />
    <button type="submit">Run Code</button>
</form>
<!-- Add this script just before the closing </body> tag -->
<script>
    // ... (keep the existing editor initialization code) ...
    // Add this new function to handle form submission
    document.getElementById("code-form").onsubmit = function() {
        // Get the text content from the editor
        var codeText = editor.getValue();
        // Set the hidden input's value to the code
        document.getElementById("code-content").value = codeText;
        // The form will now submit the code content
        return true;
    };
</script>
Update app.py
Add a new route to handle the form submission.
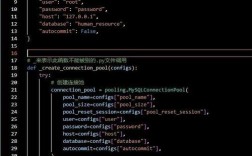
# app.py
from flask import Flask, render_template, request
app = Flask(__name__)
@app.route('/')
def index():
    return render_template('index.html')
# NEW ROUTE TO HANDLE SUBMISSION
@app.route('/submit', methods=['POST'])
def submit_code():
    # Get the code from the form's 'code' input field
    user_code = request.form['code']
    # For now, just print it to the console and return a message
    print("--- Code Received from Editor ---")
    print(user_code)
    print("---------------------------------")
    return f"<h1>Code Received!</h1><pre>{user_code}</pre><br><a href='/'>Go Back</a>"
if __name__ == '__main__':
    app.run(debug=True)
Now, when you type code in the editor and click "Run Code", it will be sent to your Python server, which will print it to the terminal and display it back on the page. This is the foundation for building features like code execution, linting, or saving files.