Of course! Using Spark with Python in Eclipse is a common setup for developers who prefer the Eclipse IDE over other tools like PyCharm or Jupyter Notebooks. It provides a robust environment for writing, debugging, and managing large-scale data processing projects.

Here is a comprehensive, step-by-step guide to setting up and running Spark applications in Python using Eclipse.
Overview of the Workflow
- Install Java: Spark runs on the Java Virtual Machine (JVM).
- Install Spark: Download and extract the Spark binary.
- Install Python & PySpark: Ensure Python is installed and install the
pysparklibrary. - Install Eclipse IDE: Download and install the Eclipse IDE for Java Developers (or your preferred flavor).
- Install PyDev Plugin: Add Python support to Eclipse.
- Configure Eclipse: Tell Eclipse where to find the Python and Spark installations.
- Create a Project: Set up a new PyDev project.
- Write Code: Create a Python script that uses PySpark.
- Run & Debug: Execute the script from Eclipse and set breakpoints for debugging.
Step-by-Step Setup Guide
Step 1: Install Java (Prerequisite)
Spark requires Java 8 or a newer version (like Java 11 or 17). Check if you have it installed:
java -version
If not, download it from the official Oracle Java site or an open-source alternative like OpenJDK.
Step 2: Install Spark
- Go to the Spark Official Download Page.
- Choose a Spark release (e.g., the latest stable version).
- Select a package type. Pre-built for Apache Hadoop is the easiest choice. You don't need Hadoop to run Spark locally, but this package includes the necessary libraries.
- Download the file (e.g.,
spark-3.4.1-bin-hadoop3.tgz). - Extract the downloaded archive to a directory of your choice (e.g.,
C:\sparkon Windows or/opt/sparkon Linux/Mac).
Step 3: Install Python and PySpark
You should have Python 3.6+ installed. If not, download it from python.org.

Next, install the pyspark library. This is the Python API for Spark. Open your terminal or command prompt and run:
pip install pyspark
Step 4: Install Eclipse IDE
- Download the Eclipse IDE for Java Developers from the Eclipse Downloads page. This version is recommended because it's lightweight and includes the necessary tools for managing JARS and environment variables that PySpark might need.
- Extract the downloaded Eclipse archive to a directory and run the
eclipse.exefile.
Step 5: Install the PyDev Plugin
PyDev is a plugin that turns Eclipse into a powerful Python IDE.
- Open Eclipse.
- Go to
Help->Install New Software.... - In the "Work with" dropdown, select
Available Software Sites. If "PyDev Update Site" is not listed, clickAdd...and add it:- Name: PyDev
- Location:
http://pydev.org/updates
- Check the box next to "PyDev" and click
Next. - Accept the license agreement and click
Finish. - Eclipse will install the plugin and may ask you to restart. Do so.
Step 6: Configure PySpark in Eclipse
This is a crucial step. You need to tell Eclipse where to find your Python interpreter and Spark installation.
-
Set Python Interpreter:
- Go to
Window->Preferences->PyDev->Interpreter - Python. - Click
New...to add a new Python interpreter. - Browse to your Python executable (e.g.,
python.exeon Windows or/usr/bin/python3on Linux). - Eclipse will automatically scan for installed packages. Make sure
pysparkis in the list. If not, you can add it manually using the button next to "Required libraries". - Click
OK.
- Go to
-
Set Environment Variables (Recommended): The easiest way to run PySpark in Eclipse is to set the
SPARK_HOMEenvironment variable.- Windows:
- Go to
Control Panel->System and Security->System->Advanced system settings. - Click
Environment Variables.... - Under "System variables", click
New.... - Variable name:
SPARK_HOME - Variable value: The path to your Spark directory (e.g.,
C:\spark\spark-3.4.1-bin-hadoop3). - Click
OK. - Find the
Pathvariable in the list, select it, and clickEdit.... - Click
Newand add%SPARK_HOME%\binto the list.
- Go to
- Linux / macOS:
- Open your shell configuration file (e.g.,
~/.bashrcor~/.zshrc). - Add the following lines:
export SPARK_HOME=/opt/spark/spark-3.4.1-bin-hadoop3
export PATH=$PATH:$SPARK_HOME/bin
- Save the file and run
source ~/.bashrc(or your shell's equivalent) to apply the changes.
- Open your shell configuration file (e.g.,
- Windows:
Step 7: Create a PyDev Project
- In Eclipse, go to
File->New->Project.... - Select
PyDev->PyDev Projectand clickNext. - Give your project a name (e.g.,
MySparkProject). - Ensure you have selected the correct Python interpreter you configured in Step 6.
- Click
Finish.
Step 8: Write a Simple Spark Application
- Right-click on your project in the "Project Explorer" view.
- Go to
New->PyDev Module. - Name the file (e.g.,
word_count.py) and clickFinish. - Paste the following code into the
word_count.pyfile. This is a classic "Hello World" example for Spark.
# word_count.py
from pyspark.sql import SparkSession
# 1. Create a SparkSession
# This is the entry point to any Spark functionality.
spark = SparkSession.builder \
    .appName("WordCount") \
    .getOrCreate()
# 2. Sample data
data = ["spark is fast", "spark is powerful", "spark is great"]
# 3. Create an RDD (Resilient Distributed Dataset) from the data
# An RDD is the fundamental data structure in Spark.
rdd = spark.sparkContext.parallelize(data)
# 4. Perform a word count
# flatMap: Split each line into words
# map: Create a pair (word, 1)
# reduceByKey: Sum the counts for each word
word_counts = rdd.flatMap(lambda line: line.split(" ")) \
                .map(lambda word: (word, 1)) \
                .reduceByKey(lambda a, b: a + b)
# 5. Collect the results
# Collect brings the data from all nodes to the driver.
# Be careful with this on large datasets!
output = word_counts.collect()
# 6. Print the results
print("Word Count Results:")
for word, count in output:
    print(f"{word}: {count}")
# 7. Stop the SparkSession
spark.stop()
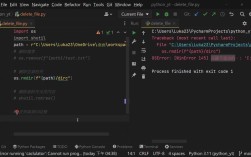
Step 9: Run the Application
- Right-click on the
word_count.pyfile in the Project Explorer. - Select
Run As->Python Run. - The output should appear in the "Console" view at the bottom of Eclipse.
Word Count Results:
spark: 3
is: 3
fast: 1
powerful: 1
great: 1
Step 10: Debugging (Optional)
Eclipse's debugger is one of its biggest advantages.
- Set a Breakpoint: Double-click in the margin to the left of a line number (e.g., the line
output = word_counts.collect()). A blue dot will appear. - Debug the Application: Right-click on the file and select
Debug As->Python Run. - Debug Perspective: Eclipse will switch to the "Debug" perspective. You can see variables, control execution (step over, step into, resume), and inspect the state of your application.
Important Considerations & Best Practices
- Working with JARS: If your Spark application needs external JARs (e.g., for connecting to a database like PostgreSQL or a data source like Delta Lake), you have two options:
- Add to Project: Place the JAR file in your project's
libfolder and add it to the project's build path (`Right
- Add to Project: Place the JAR file in your project's