Of course! The term "fetch many" in Python almost always refers to a specific and highly efficient method used with database cursors, particularly in the psycopg2 library for PostgreSQL.
Let's break it down.
The Core Concept: cursor.fetchmany()
When you execute a SQL query that returns many rows (e.g., SELECT * FROM large_table), you don't want to load all thousands or millions of rows into your computer's memory at once. This would be incredibly slow and could easily crash your application.
The solution is to fetch the results in manageable chunks or batches.
This is where cursor.fetchmany(size) comes in. It's a method that retrieves the next set of rows from a query result set, allowing you to process them one batch at a time.
Why Use fetchmany()? (The Benefits)
- Memory Efficiency: This is the primary reason. You only ever have a small chunk of data in memory at any given time, making it ideal for processing very large datasets.
- Responsiveness: Your application can start processing the first rows of data while the rest are still being fetched from the database, rather than waiting for the entire result set to be transferred.
- Control: You have fine-grained control over how many rows are processed in each iteration, which can be useful for tuning performance or managing resources.
How It Works: A Step-by-Step Example
Let's use psycopg2, the most popular PostgreSQL adapter for Python.
Step 1: Setup (Prerequisites)
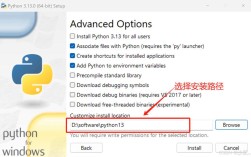
First, make sure you have psycopg2 installed and a running PostgreSQL database.
pip install psycopg2-binary
For this example, let's create a sample table and insert some data.
-- In your PostgreSQL database shell
CREATE TABLE my_large_data (id SERIAL, item_name VARCHAR(50), value INT);
-- Insert 100,000 rows for a realistic "large" dataset
INSERT INTO my_large_data (item_name, value)
SELECT 'item_' || i, (i * 7) % 100
FROM generate_series(1, 100000) as i;
Step 2: The Python Code
Here is a complete Python script that demonstrates how to use fetchmany().
import psycopg2
import time
# --- Database Connection Details ---
# Replace with your actual database credentials
DB_NAME = "your_db_name"
DB_USER = "your_db_user"
DB_PASS = "your_db_password"
DB_HOST = "localhost"
DB_PORT = "5432"
def process_large_dataset():
    """
    Connects to the database, fetches data in batches using fetchmany(),
    and processes each batch.
    """
    conn = None
    try:
        # 1. Establish a connection to the database
        print("Connecting to the database...")
        conn = psycopg2.connect(
            dbname=DB_NAME,
            user=DB_USER,
            password=DB_PASS,
            host=DB_HOST,
            port=DB_PORT
        )
        cursor = conn.cursor()
        # 2. Execute a query that returns a large number of rows
        print("Executing query to fetch 100,000 rows...")
        cursor.execute("SELECT id, item_name, value FROM my_large_data ORDER BY id;")
        # 3. Define the batch size
        # This is the "many" in "fetch many".
        batch_size = 1000
        print(f"\nProcessing data in batches of {batch_size}...")
        # 4. Loop and fetch batches until there are no more rows
        while True:
            # Fetch the next batch of rows
            rows = cursor.fetchmany(batch_size)
            # If fetchmany() returns an empty list, we're done
            if not rows:
                print("\nFinished processing all data.")
                break
            # Process the current batch
            # In a real app, you would do something here, like:
            # - Perform calculations
            # - Write to a file
            # - Send to an API
            # - Update another table
            print(f"  -> Processing batch of {len(rows)} rows...")
            # Example of processing: just print the first row of the batch
            # for row in rows:
            #     print(f"    Processing ID: {row[0]}, Name: {row[1]}")
            # For this demo, we'll just add a small delay to simulate work
            time.sleep(0.01)
    except (Exception, psycopg2.Error) as error:
        print("Error while connecting to PostgreSQL or fetching data:", error)
    finally:
        # 5. Clean up: Close the cursor and connection
        if conn is not None:
            cursor.close()
            conn.close()
            print("Database connection closed.")
# Run the function
if __name__ == "__main__":
    process_large_dataset()
How the Script Works:
- Connect: It establishes a connection to the database.
- Execute: It runs the
SELECTquery. The results are now held on the database server, waiting to be fetched. - Define Batch Size: We choose a
batch_sizeof 1000. This is a tunable parameter. while TrueLoop: This loop continues indefinitely until we explicitly break out of it.cursor.fetchmany(batch_size): This is the key line. It asks the database for the nextbatch_sizerows (1000 in our case). It returns a list of tuples.- Check for Completion: If
fetchmany()returns an empty list ([]), it means there are no more rows to fetch, and webreakthe loop. - Process: The script then "processes" the batch. In our simple example, this just means printing a message and simulating work with
time.sleep(). - Repeat: The loop goes back to the top and calls
fetchmany()again for the next 1000 rows.
Comparison with Other Fetch Methods
To understand fetchmany() better, it's helpful to compare it with its siblings.
| Method | Description | When to Use | Memory Impact |
|---|---|---|---|
fetchone() |
Fetches the next single row from the result set. Returns None if no more rows. |
When you expect only one row (e.g., SELECT ... WHERE id = 123) or when you want to process rows one by one with more control. |
Very Low. Only one row in memory at a time. |
fetchmany(size) |
Fetches the next size rows. Returns an empty list if no more rows. |
The ideal choice for processing large datasets. Balances memory usage and performance. | Low. Memory usage is bounded by size. |
fetchall() |
Fetches ALL remaining rows from the result set into a single list. | When you are certain the result set is small and you can afford to load it all into memory. | High. Can cause memory exhaustion or crashes with large datasets. Avoid this for large tables. |
Advanced Tip: Server-Side Cursors
By default, psycopg2 uses a client-side cursor. This means the entire result set is transferred from the database to your Python application all at once, and then fetchmany() just pulls rows from that local cache. This defeats the main purpose of fetchmany() for memory efficiency.
To truly get the benefit of fetching in batches, you should use a server-side cursor.
A server-side cursor keeps the result set on the database server and only transfers a small batch of rows at a time.
How to use it:
You just need to add the name parameter to your cursor.execute() call. The name can be anything.
# Instead of:
# cursor.execute("SELECT ...")
# Use:
cursor.execute("SELECT id, item_name, value FROM my_large_data ORDER BY id;", name="my_large_cursor")
When you use a named cursor, fetchmany() will now issue a new network request to the database server for each batch, dramatically reducing memory usage on the client side.
Important Note: Server-side cursors hold locks on the database tables. If your query is slow, this can block other operations. Always ensure you close the cursor when you're done to release the lock.
# With a server-side cursor, it's CRUCIAL to close it
cursor.close()