Of course! Using Python in Android Studio is a very popular and powerful combination, especially for machine learning, data processing, and scripting. It's not about building a traditional Android app with Python, but rather about using Python's strengths within the Android development ecosystem.

Here’s a complete guide covering the main ways to integrate Python into Android Studio, from the most common and recommended to more advanced methods.
Summary of Methods
| Method | How it Works | Best For | Pros | Cons |
|---|---|---|---|---|
| Kivy | A Python framework that uses its own engine to build native UIs. | Building a complete, cross-platform mobile app (Android & iOS) using only Python. | True Python-native app, cross-platform, mature framework. | UI might not look "native" to Android, larger app size, less integration with Android OS features. |
| BeeWare | Uses a Python runtime and a "native" widget toolkit to create UIs that look like the OS. | Building a complete, cross-platform app that looks and feels native. | UIs look native, Python-first, great tooling. | Smaller community than Kivy, still evolving. |
| ML Kit / TensorFlow Lite | The most common and practical method. You train a model in Python (using TensorFlow, PyTorch, etc.), convert it to a mobile-friendly format (TFLite), and run inference in a standard Android app (built with Kotlin/Java). | Machine Learning and AI features in a native Android app (e.g., image recognition, text analysis, object detection). | High performance, uses GPU/Neural Processing Unit (NPU), seamless integration with Android, leverages Python's ML ecosystem. | Not for general-purpose scripting; the core app logic is still in Kotlin/Java. |
| Chaquopy | A plugin for Android Studio that lets you embed a Python interpreter directly into your Android app. | Running Python scripts, data analysis, or small libraries inside a standard Android app. | True Python integration within Android Studio, use any Python library (NumPy, Pandas, etc.), easy to debug. | Can increase app size, potential performance overhead for heavy tasks, requires managing two runtimes. |
| Termux | A terminal emulator and Linux environment for Android that includes Python. | Power users, developers, and system administrators who want to run Python scripts, servers, or CLI tools directly on their Android device. | Full Linux environment, install any Python package via pip, no need for a traditional app. |
Not an integration with Android Studio. The user runs it as a separate app. No UI for your app. |
Method 1: Building a Native App with Kivy (Recommended for Full Python Apps)
Kivy is an open-source Python library for developing multitouch applications. It runs on Windows, macOS, Linux, Android, and iOS.
How it Works:
- You write your entire application logic and UI in Python.
- Kivy uses its own rendering engine to draw the UI on the screen.
- You use a special build tool (e.g.,
buildozer) to package your Python code into an standard Android APK.
Step-by-Step Guide:

-
Install Prerequisites:
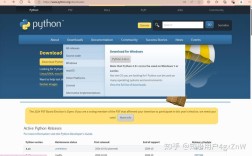
- Install Python on your system.
- Install Kivy:
pip install kivy - Install the build tool for Android:
pip install --upgrade buildozer
-
Create a Kivy App (
main.py):from kivy.app import App from kivy.uix.button import Button class TestApp(App): def build(self): return Button(text='Hello from Kivy on Android!') if __name__ == '__main__': TestApp().run() -
Initialize Buildozer:
- Create a project folder and place your
main.pyfile inside. - Open a terminal in that folder and run:
buildozer init - This creates a
buildozer.specfile. You'll need to edit this file to configure your app (name, permissions, orientation, etc.). For a simple start, you can mostly leave it as is.
- Create a project folder and place your
-
Build the APK:
 (图片来源网络,侵删)
- Connect an Android device or start an emulator.
- Run the build command:
buildozer android debug deploy run buildozerwill download the Android SDK/NDK, compile your app, install it on the device, and run it. This first run will take a very long time!
Method 2: Using Python for Machine Learning with ML Kit (Most Practical Method)
This is the industry-standard approach for adding AI features to an app. Your app's UI and core logic are built with Kotlin or Java, but the "brains" are a Python-trained model.
How it Works:
- Train in Python: Use TensorFlow, PyTorch, or Scikit-learn in Python to create your machine learning model.
- Convert to TFLite: Convert your trained model into the TensorFlow Lite (
.tflite) format, which is optimized for mobile devices. - Integrate in Android Studio: Add the
.tflitefile to your Android project. Use the ML Kit or TFLite APIs in your Kotlin/Java code to load the model and run inference (make predictions).
High-Level Steps in Android Studio:
-
Create a new Android Project (using Kotlin or Java).
-
Add ML Kit/TFLite Dependency: In your
build.gradle (Module: app)file, add the necessary dependencies.// For ML Kit implementation 'com.google.mlkit:object-detection:16.0.0' // Example for object detection // For TensorFlow Lite implementation 'org.tensorflow:tensorflow-lite:2.14.0' implementation 'org.tensorflow:tensorflow-lite-gpu:2.14.0' // For GPU acceleration
-
Add Your Model: Place your converted
.tflitefile in theapp/src/main/assetsdirectory. -
Write Inference Code: In your Activity or Fragment, load the model and pass input data (e.g., an image bitmap) to get a result.
This method combines the best of both worlds: the power and ecosystem of Python for AI, and the performance and native feel of Kotlin/Java for the app itself.
Method 3: Embedding Python with Chaquopy (Best for Scripting & Libraries)
Chaquopy is a commercial plugin (with a free version) that embeds a Python interpreter directly into your Android app. This allows you to run Python code and call Python libraries from your Kotlin/Java app.
How it Works:
- You create a standard Android project in Android Studio using Kotlin or Java.
- You add the Chaquopy plugin to your project.
- You place your Python scripts (
.pyfiles) in thesrc/main/pythondirectory. - You can call Python functions directly from your Kotlin code.
Step-by-Step Guide:
-
Install the Plugin: In Android Studio, go to
File>Settings>Plugins, search for "Chaquopy", and install it. Restart Android Studio. -
Configure
build.gradle:- In your
build.gradle (Module: app)file, add the Chaquopy plugin and repositories at the top.plugins { id 'com.android.application' id 'org.chaquopy.android' version '15.0.0' // Check for the latest version }
android { // ... }
repositories { // ... maven { url 'https://chaquo.com/maven' } }
- In your
-
Add Python Dependencies: In the same
build.gradlefile, declare the Python packages you need.chaquopy { python { // The default version is 3.8. // pypi { // "Pillow": "9.5.0" // Example: Add a specific version of a library // } } }You can also install packages via the command line:
python -m pip install numpy. -
Create Python Code: Create a directory
src/main/pythonin your project and add a filemy_module.py.# src/main/python/my_module.py def greet(name): return f"Hello, {name} from Python!" def add_numbers(a, b): return a + b -
Call Python from Kotlin:
// In your MainActivity.kt
import com.chaquo.python.Python
import com.chaquo.python.android.AndroidPlatform
class MainActivity : AppCompatActivity() {
    override fun onCreate(savedInstanceState: Bundle?) {
        super.onCreate(savedInstanceState)
        setContentView(R.layout.activity_main)
        // Initialize Python
        if (!Python.isStarted()) {
            Python.start(AndroidPlatform(this))
        }
        // Get the Python instance
        val py = Python.getInstance()