Of course! "Python Qt Windows" is a broad topic, but it generally refers to using the Python programming language with the Qt framework to create graphical user interfaces (GUIs) that run on Windows.

Let's break this down into the essential components and provide a comprehensive guide.
The Core Components
a) Python
The programming language. It's versatile, easy to learn, and has a massive ecosystem of libraries.
b) Qt
A powerful, mature, and cross-platform framework for creating desktop, mobile, and embedded applications. It's known for its rich set of widgets and professional look-and-feel.
c) Windows
The target operating system. The beauty of using Qt is that you can write your application once and compile it for Windows, macOS, and Linux with minimal changes.

How to Connect Python and Qt: The Bindings
You can't use Python directly with Qt. You need a "binding"—a library that acts as a bridge, allowing your Python code to call Qt's underlying C++ functions. There are two main, modern options:
Option 1: PySide6 (Recommended for New Projects)
This is the official binding from The Qt Company. It's open-source and is the future of Python-Qt development.
- Pros:
- Official support from Qt.
- Excellent documentation and community.
- Kept in sync with new Qt releases (like Qt6).
- License is LGPL, which is very permissive for commercial applications.
- Installation:
pip install PySide6
Option 2: PyQt6
A very popular and mature set of bindings created by Riverbank Computing.
- Pros:
- Extremely stable and well-established.
- Large community and lots of tutorials available.
- Excellent documentation.
- Cons:
- The license is GPL (for the open-source version) or a commercial license. If you are writing a closed-source, commercial application, you must purchase a commercial license.
- Installation:
pip install PyQt6
Recommendation: For any new project, start with PySide6. It's the official path and avoids licensing complexities for commercial use.
Your First "Python Qt Window" (Hello World)
Here is a simple example using PySide6. This code creates a window with a single button. When you click the button, it closes the application.
import sys
from PySide6.QtWidgets import QApplication, QMainWindow, QPushButton, QWidget, QVBoxLayout
# 1. Create a main application object
# QApplication manages the GUI application's control flow and main settings.
app = QApplication(sys.argv)
# 2. Create a main window
# QMainWindow is the top-level window with a title bar, menu bar, and status bar.
window = QMainWindow()
window.setWindowTitle("My First Qt Window")
window.setGeometry(100, 100, 400, 300) # x, y, width, height
# 3. Create a central widget and a layout
# A window needs a central widget to hold other widgets.
central_widget = QWidget()
window.setCentralWidget(central_widget)
# A layout manages the position and size of widgets within another widget.
layout = QVBoxLayout(central_widget)
# 4. Create a button
button = QPushButton("Click Me!")
layout.addWidget(button)
# 5. Connect a signal to a slot
# This is the core of event-driven programming in Qt.
# The 'clicked' signal of the button is connected to the 'close' slot of the window.
button.clicked.connect(window.close)
# 6. Show the window and start the application's event loop
window.show()
sys.exit(app.exec()) # The app.exec() starts the event loop. sys.exit ensures a clean exit.
To run this:
- Make sure you have Python installed.
- Install PySide6:
pip install PySide6 - Save the code as
hello_window.py. - Run from the terminal:
python hello_window.py
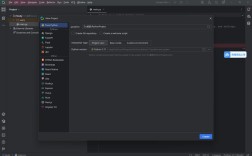
You will see a window like this:
Key Concepts for Building Windows
Understanding these terms is crucial for building anything beyond a simple "Hello World" app.
- Widgets (
QWidgets): The basic building blocks of a Qt GUI. Everything is a widget: buttons (QPushButton), labels (QLabel), text input fields (QLineEdit), the main window itself (QMainWindow), and even containers for other widgets (QWidget). - Layouts (
QVBoxLayout,QHBoxLayout, etc.): Instead of manually setting thex, y, width, heightof every widget, you use layouts. They automatically position and resize widgets when the window is resized. This is essential for creating responsive UIs.QVBoxLayout: Arranges widgets vertically (top to bottom).QHBoxLayout: Arranges widgets horizontally (left to right).QGridLayout: Arranges widgets in a grid.QFormLayout: Perfect for creating forms with labels and input fields.
- Signals and Slots: This is Qt's mechanism for communication between objects.
- Signal: An event that is emitted by a widget (e.g., a button is
clicked, a slider'svalueChanged). - Slot: A function that is called in response to a signal.
- You
connecta signal to a slot. Example:button.clicked.connect(my_function).
- Signal: An event that is emitted by a widget (e.g., a button is
QMainWindow: A pre-built main window with standard areas:- Central Widget: The main content area (e.g., where you'd put a text editor or a custom drawing area).
- Menu Bar: Standard file/edit/view menus.
- Toolbars: Rows of clickable icons.
- Status Bar: A bar at the bottom, often for showing status messages.
- Resources (Icons, Images): To embed images or icons, you use Qt's Resource System (
qrcfiles). You compile your resources (images, etc.) into a Python file that your application can access easily.
Building and Distributing Your Application on Windows
Once you've written your Python script, you need to package it so that other Windows users can run it without needing to install Python or any dependencies.
The standard tool for this is PyInstaller.
Step 1: Install PyInstaller
pip install pyinstaller
Step 2: Create Your Application Script
Let's say you have a file named my_app.py that contains your main application logic.
Step 3: Build the Executable
Open a command prompt or PowerShell in the same directory as your script and run:
pyinstaller --windowed --onefile my_app.py
Breaking down the command:
pyinstaller: The command to run the tool.--windowed: This tells PyInstaller to create a GUI application (no console window will appear). If you were making a command-line tool, you would omit this.--onefile: This bundles everything into a single.exefile. It's convenient but can be slightly slower to start than a directory-based build. For beginners, this is the easiest option.my_app.py: Your main Python script.
Step 4: Find Your Executable
After the build process finishes, PyInstaller will create a few folders:
build/: Temporary files (you can delete this).dist/: This is where your application is! You will findmy_app.exeinside thedistfolder.
You can now copy the my_app.exe file to any other Windows computer, and it should run directly, showing your Qt window.
Popular Tools for Qt Development in Python
While you can write everything in a text editor, using an Integrated Development Environment (IDE) makes life much easier.
- PyCharm (Professional or Community Edition): The most popular choice. It has excellent built-in support for Qt, including:
- Qt Designer integration (a drag-and-drop UI builder).
- Syntax highlighting and code completion for PySide/PyQt.
- A debugger that can inspect Qt objects.
- Visual Studio Code (with Extensions): A very lightweight and powerful option. Install the "Python" and "Qt for Python" extensions from Microsoft to get similar features to PyCharm.
- Qt Designer: A standalone, free tool from The Qt Company. You can use it to visually design your UIs (
.uifiles) and then load them into your Python code, separating your UI design from your application logic. This is a highly recommended workflow.