Of course! Using the requests library on a Mac is a very common task. Here's a comprehensive guide covering installation, basic usage, and common scenarios, with specific Mac-related notes.

Installation
First, you need to install the requests library. The best way to do this on a Mac (or any system) is using pip, Python's package installer.
Prerequisites: Python and Pip
Most modern Macs come with Python 3 pre-installed. You can check this by opening your Terminal (you can find it in Applications/Utilities or search for it with Spotlight).
# Check if Python 3 is installed
python3 --version
# Check if pip (Python's package installer) is installed
pip3 --version
If pip3 is not found, you can install it easily:
# Install pip using the ensurepip module
python3 -m ensurepip --upgrade
Installing requests
Now, use pip3 to install the requests library. It's a good practice to use pip3 to ensure you're installing the package for your Python 3 environment.

# In your Terminal
pip3 install requests
You should see output indicating that requests and its dependencies (like urllib3 and chardet) have been successfully installed.
Basic Usage in Python
Once installed, you can import and use requests in your Python scripts. Here are the most common HTTP methods.
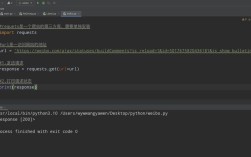
Example 1: GET Request (Fetching Data)
This is the most common request, used to retrieve data from a server.
import requests
# The URL you want to get data from
url = "https://api.github.com"
try:
    # Send a GET request
    response = requests.get(url)
    # Raise an exception if the request was unsuccessful (e.g., 404 Not Found, 500 Server Error)
    response.raise_for_status()
    # The response object contains the server's response
    print(f"Status Code: {response.status_code}")
    print(f"Headers: {response.headers}")
    # The content of the response
    # .text returns the content as a string
    print("\n--- Response Text (first 200 chars) ---")
    print(response.text[:200])
    # .json() parses the response content as JSON (if it is JSON)
    # This is very common with modern APIs
    data = response.json()
    print("\n--- Parsed JSON Data ---")
    print(f"API URL: {data.get('current_user_url')}")
except requests.exceptions.HTTPError as errh:
    print(f"Http Error: {errh}")
except requests.exceptions.ConnectionError as errc:
    print(f"Error Connecting: {errc}")
except requests.exceptions.Timeout as errt:
    print(f"Timeout Error: {errt}")
except requests.exceptions.RequestException as err:
    print(f"Oops: Something Else: {err}")
Example 2: POST Request (Sending Data)
This is used to send data to a server, often to create a new resource.

import requests
import json # Used for pretty-printing the dictionary
# The URL for the API endpoint
url = "https://httpbin.org/post"
# The data you want to send
payload = {
    'username': 'john_doe',
    'email': 'john.doe@example.com'
}
# The headers for the request
headers = {
    'Content-Type': 'application/json'
}
try:
    # Send a POST request with the JSON payload
    response = requests.post(url, data=json.dumps(payload), headers=headers)
    # Raise an exception for bad status codes
    response.raise_for_status()
    # The response from the server
    print(f"Status Code: {response.status_code}")
    print("\n--- Server's Response ---")
    # httpbin.org returns a JSON that includes our original data
    print(response.json())
except requests.exceptions.RequestException as e:
    print(f"An error occurred: {e}")
Common Scenarios & Advanced Usage
a. Handling Query Parameters
Often, you need to pass parameters in the URL (e.g., ?key=value&key2=value2). You can use the params argument.
import requests
url = "https://httpbin.org/get"
# The parameters to add to the URL
params = {
    'q': 'python requests',
    'page': 1
}
response = requests.get(url, params=params)
print(f"Full URL: {response.url}") # The URL with parameters appended
print(response.json())
b. Handling Authentication
Many APIs require authentication. requests makes this easy.
import requests
url = "https://api.github.com/user"
# Basic Authentication
# Replace with your actual GitHub username and personal access token
username = 'your_github_username'
password = 'your_github_personal_access_token'
response = requests.get(url, auth=(username, password))
print(f"Status Code: {response.status_code}")
if response.status_code == 200:
    print("Authentication successful!")
    print(response.json())
else:
    print("Authentication failed.")
c. Setting Timeouts
A request can hang indefinitely if the server is slow or unresponsive. Always set a timeout.
import requests
try:
    # Timeout is in seconds. This will raise a Timeout exception after 5 seconds.
    response = requests.get('https://httpbin.org/delay/10', timeout=5)
    print(response.text)
except requests.exceptions.Timeout:
    print("The request timed out!")
d. Handling Sessions
If you are making multiple requests to the same host, a Session object can persist certain parameters (like cookies) and improve performance.
import requests
# Create a session object
with requests.Session() as session:
    # Set cookies that will be used for all requests in this session
    session.cookies.set('name', 'value')
    # First request
    response1 = session.get('https://httpbin.org/cookies')
    print("Request 1 Cookies:", response1.json())
    # Second request (the cookie is automatically sent)
    response2 = session.get('https://httpbin.org/cookies')
    print("Request 2 Cookies:", response2.json())
Mac-Specific Tips & Troubleshooting
a. Using Virtual Environments (Highly Recommended)
It's a best practice to keep your project dependencies isolated. Use venv to create a dedicated environment for each project.
-
Navigate to your project directory in the Terminal:
cd /path/to/your/project
-
Create a virtual environment:
# This creates a 'venv' folder
python3 -m venv venv
-
Activate the environment:
source venv/bin/activate
Your terminal prompt will change to show
(venv). -
Now, install
requestsinside the environment:pip install requests
-
When you're done, deactivate the environment:
deactivate
b. SSL Certificate Issues
On a Mac, you might sometimes encounter SSL/HTTPS errors, especially if you're working on a corporate network or with self-signed certificates.
requests.exceptions.SSLError: HTTPSConnectionPool(host='...', port=443): Max retries exceeded with url: ... (Caused by SSLError(SSLCertVerificationError(...Solutions:
-
Update Certificates: The easiest fix is often to update your system's root certificates.
# Run this in your Terminal
/Applications/Python\ 3.x/Install\ Certificates.command
(Replace
xwith your actual Python version, e.g.,10). This script downloads and installs thecertifipackage's certificates. -
Disable SSL Verification (Use with Caution): For testing purposes only, you can disable SSL verification. This is insecure and should not be used in production.
requests.get('https://example.com', verify=False) -
Specify a Certificate File: If you have a specific certificate file (e.g., from your company), you can point to it.
requests.get('https://example.com', verify='/path/to/your/certificate.pem')
c. Permissions Issues
If you get a PermissionError when trying to install with pip, it's likely because you're trying to install globally. Always use a virtual environment to avoid this. If you must install globally, you can use sudo, but this is not recommended as it can lead to system-wide conflicts.
# NOT RECOMMENDED
sudo pip3 install requests