- 添加学生
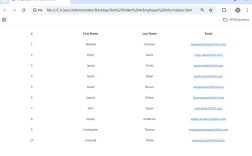
- 查询所有学生
- 根据ID查询学生
- 更新学生信息
- 删除学生
我们将使用 MVC(Model-View-Controller) 设计模式来组织代码,这是一种非常规范和易于扩展的架构。

(图片来源网络,侵删)
第一步:环境准备
- Java Development Kit (JDK): 确保你已安装 JDK 8 或更高版本。
- MySQL Server: 确保你已安装并启动了 MySQL 数据库。
- IDE: 推荐使用 IntelliJ IDEA 或 Eclipse。
- MySQL Connector/J: 这是 Java 连接 MySQL 数据库的驱动程序,你可以从 MySQL 官网 下载,或者如果你的项目使用 Maven,可以直接添加依赖。
第二步:项目结构
我们将创建一个标准的 Maven 项目,并按照 MVC 模式组织代码。
student-management-system/
├── src/
│   ├── main/
│   │   ├── java/
│   │   │   └── com/
│   │   │       └── example/
│   │   │           ├── controller/
│   │   │           │   └── StudentController.java
│   │   │           ├── model/
│   │   │           │   └── Student.java
│   │   │           ├── repository/
│   │   │           │   └── StudentRepository.java
│   │   │           ├── util/
│   │   │           │   └── DatabaseUtil.java
│   │   │           └── App.java (主程序入口)
│   │   └── resources/
│   │       └── db.properties (数据库配置文件)
│   └── test/
├── pom.xml (Maven 项目配置文件)
第三步:实现代码
数据库配置 (db.properties)
在 src/main/resources 目录下创建 db.properties 文件,用于存储数据库连接信息,方便修改。
# db.properties
db.driver=com.mysql.cj.jdbc.Driver
db.url=jdbc:mysql://localhost:3306/student_db?useSSL=false&serverTimezone=UTC
db.username=root
db.password=your_password
注意:
student_db: 你需要在 MySQL 中创建这个数据库。root: 你的 MySQL 用户名。your_password: 你的 MySQL 密码。useSSL=false: 在开发环境中可以禁用 SSL 以简化连接。serverTimezone=UTC: 设置时区,避免警告。
Maven 依赖 (pom.xml)
如果你的项目是 Maven 项目,pom.xml 文件需要包含以下依赖:

(图片来源网络,侵删)
<dependencies>
    <!-- MySQL Connector/J -->
    <dependency>
        <groupId>mysql</groupId>
        <artifactId>mysql-connector-java</artifactId>
        <version>8.0.33</version> <!-- 使用你下载的版本号 -->
    </dependency>
    <!-- JUnit (用于单元测试,可选) -->
    <dependency>
        <groupId>org.junit.jupiter</groupId>
        <artifactId>junit-jupiter-api</artifactId>
        <version>5.9.2</version>
        <scope>test</scope>
    </dependency>
</dependencies>
Model (模型层)
Student.java - 代表学生实体类。
// src/main/java/com/example/model/Student.java
package com.example.model;
public class Student {
    private int id;
    private String name;
    private String email;
    private String phone;
    // 构造方法
    public Student() {}
    public Student(String name, String email, String phone) {
        this.name = name;
        this.email = email;
        this.phone = phone;
    }
    // Getters and Setters
    public int getId() {
        return id;
    }
    public void setId(int id) {
        this.id = id;
    }
    public String getName() {
        return name;
    }
    public void setName(String name) {
        this.name = name;
    }
    public String getEmail() {
        return email;
    }
    public void setEmail(String email) {
        this.email = email;
    }
    public String getPhone() {
        return phone;
    }
    public void setPhone(String phone) {
        this.phone = phone;
    }
    @Override
    public String toString() {
        return "Student{" +
                "id=" + id +
                ", name='" + name + '\'' +
                ", email='" + email + '\'' +
                ", phone='" + phone + '\'' +
                '}';
    }
}
Database Utility (数据库工具类)
DatabaseUtil.java - 负责管理数据库连接的打开和关闭。
// src/main/java/com/example/util/DatabaseUtil.java
package com.example.util;
import java.io.IOException;
import java.io.InputStream;
import java.sql.Connection;
import java.sql.DriverManager;
import java.sql.SQLException;
import java.util.Properties;
public class DatabaseUtil {
    private static Connection connection = null;
    public static Connection getConnection() {
        if (connection != null) {
            return connection;
        }
        try (InputStream input = DatabaseUtil.class.getClassLoader().getResourceAsStream("db.properties")) {
            Properties prop = new Properties();
            if (input == null) {
                throw new RuntimeException("Sorry, unable to find db.properties");
            }
            prop.load(input);
            String driver = prop.getProperty("db.driver");
            String url = prop.getProperty("db.url");
            String username = prop.getProperty("db.username");
            String password = prop.getProperty("db.password");
            Class.forName(driver);
            connection = DriverManager.getConnection(url, username, password);
            System.out.println("Database connection established successfully.");
        } catch (IOException | ClassNotFoundException | SQLException e) {
            throw new RuntimeException("Failed to connect to the database", e);
        }
        return connection;
    }
    public static void closeConnection() {
        if (connection != null) {
            try {
                connection.close();
                System.out.println("Database connection closed.");
            } catch (SQLException e) {
                e.printStackTrace();
            }
        }
    }
}
Repository (数据访问层)
StudentRepository.java - 包含所有与数据库交互的逻辑(增删改查)。
// src/main/java/com/example/repository/StudentRepository.java
package com.example.repository;
import com.example.model.Student;
import com.example.util.DatabaseUtil;
import java.sql.*;
import java.util.ArrayList;
import java.util.List;
public class StudentRepository {
    // 添加学生
    public void addStudent(Student student) {
        String sql = "INSERT INTO students (name, email, phone) VALUES (?, ?, ?)";
        try (Connection conn = DatabaseUtil.getConnection();
             PreparedStatement pstmt = conn.prepareStatement(sql)) {
            pstmt.setString(1, student.getName());
            pstmt.setString(2, student.getEmail());
            pstmt.setString(3, student.getPhone());
            pstmt.executeUpdate();
            System.out.println("Student added successfully.");
        } catch (SQLException e) {
            e.printStackTrace();
        }
    }
    // 根据 ID 获取学生
    public Student getStudentById(int id) {
        String sql = "SELECT * FROM students WHERE id = ?";
        Student student = null;
        try (Connection conn = DatabaseUtil.getConnection();
             PreparedStatement pstmt = conn.prepareStatement(sql)) {
            pstmt.setInt(1, id);
            ResultSet rs = pstmt.executeQuery();
            if (rs.next()) {
                student = new Student();
                student.setId(rs.getInt("id"));
                student.setName(rs.getString("name"));
                student.setEmail(rs.getString("email"));
                student.setPhone(rs.getString("phone"));
            }
        } catch (SQLException e) {
            e.printStackTrace();
        }
        return student;
    }
    // 获取所有学生
    public List<Student> getAllStudents() {
        List<Student> students = new ArrayList<>();
        String sql = "SELECT * FROM students";
        try (Connection conn = DatabaseUtil.getConnection();
             Statement stmt = conn.createStatement();
             ResultSet rs = stmt.executeQuery(sql)) {
            while (rs.next()) {
                Student student = new Student();
                student.setId(rs.getInt("id"));
                student.setName(rs.getString("name"));
                student.setEmail(rs.getString("email"));
                student.setPhone(rs.getString("phone"));
                students.add(student);
            }
        } catch (SQLException e) {
            e.printStackTrace();
        }
        return students;
    }
    // 更新学生信息
    public void updateStudent(Student student) {
        String sql = "UPDATE students SET name = ?, email = ?, phone = ? WHERE id = ?";
        try (Connection conn = DatabaseUtil.getConnection();
             PreparedStatement pstmt = conn.prepareStatement(sql)) {
            pstmt.setString(1, student.getName());
            pstmt.setString(2, student.getEmail());
            pstmt.setString(3, student.getPhone());
            pstmt.setInt(4, student.getId());
            int affectedRows = pstmt.executeUpdate();
            if (affectedRows > 0) {
                System.out.println("Student updated successfully.");
            } else {
                System.out.println("No student found with ID: " + student.getId());
            }
        } catch (SQLException e) {
            e.printStackTrace();
        }
    }
    // 删除学生
    public void deleteStudent(int id) {
        String sql = "DELETE FROM students WHERE id = ?";
        try (Connection conn = DatabaseUtil.getConnection();
             PreparedStatement pstmt = conn.prepareStatement(sql)) {
            pstmt.setInt(1, id);
            int affectedRows = pstmt.executeUpdate();
            if (affectedRows > 0) {
                System.out.println("Student deleted successfully.");
            } else {
                System.out.println("No student found with ID: " + id);
            }
        } catch (SQLException e) {
            e.printStackTrace();
        }
    }
}
Controller (控制层)
StudentController.java - 调用 Repository 层的方法,并处理业务逻辑。

(图片来源网络,侵删)
// src/main/java/com/example/controller/StudentController.java
package com.example.controller;
import com.example.model.Student;
import com.example.repository.StudentRepository;
import java.util.List;
public class StudentController {
    private StudentRepository studentRepository;
    public StudentController() {
        this.studentRepository = new StudentRepository();
    }
    public void addStudent(String name, String email, String phone) {
        Student student = new Student(name, email, phone);
        studentRepository.addStudent(student);
    }
    public Student getStudentById(int id) {
        return studentRepository.getStudentById(id);
    }
    public void displayAllStudents() {
        List<Student> students = studentRepository.getAllStudents();
        if (students.isEmpty()) {
            System.out.println("No students found.");
        } else {
            System.out.println("--- All Students ---");
            for (Student student : students) {
                System.out.println(student);
            }
        }
    }
    public void updateStudent(int id, String name, String email, String phone) {
        Student student = new Student();
        student.setId(id);
        student.setName(name);
        student.setEmail(email);
        student.setPhone(phone);
        studentRepository.updateStudent(student);
    }
    public void deleteStudent(int id) {
        studentRepository.deleteStudent(id);
    }
}
主程序入口 (App.java)
App.java - 程序的启动点,用于演示系统的功能。
// src/main/java/com/example/App.java
package com.example;
import com.example.controller.StudentController;
import java.util.Scanner;
public class App {
    public static void main(String[] args) {
        StudentController controller = new StudentController();
        Scanner scanner = new Scanner(System.in);
        while (true) {
            System.out.println("\n--- Student Management System ---");
            System.out.println("1. Add Student");
            System.out.println("2. View All Students");
            System.out.println("3. Find Student by ID");
            System.out.println("4. Update Student");
            System.out.println("5. Delete Student");
            System.out.println("6. Exit");
            System.out.print("Enter your choice: ");
            int choice;
            try {
                choice = scanner.nextInt();
                scanner.nextLine(); // 消耗换行符
            } catch (Exception e) {
                System.out.println("Invalid input. Please enter a number.");
                scanner.nextLine(); // 清除错误的输入
                continue;
            }
            switch (choice) {
                case 1:
                    System.out.print("Enter name: ");
                    String name = scanner.nextLine();
                    System.out.print("Enter email: ");
                    String email = scanner.nextLine();
                    System.out.print("Enter phone: ");
                    String phone = scanner.nextLine();
                    controller.addStudent(name, email, phone);
                    break;
                case 2:
                    controller.displayAllStudents();
                    break;
                case 3:
                    System.out.print("Enter student ID to find: ");
                    int id = scanner.nextInt();
                    Student student = controller.getStudentById(id);
                    if (student != null) {
                        System.out.println("Student found: " + student);
                    } else {
                        System.out.println("Student with ID " + id + " not found.");
                    }
                    break;
                case 4:
                    System.out.print("Enter student ID to update: ");
                    int updateId = scanner.nextInt();
                    scanner.nextLine(); // 消耗换行符
                    System.out.print("Enter new name: ");
                    String newName = scanner.nextLine();
                    System.out.print("Enter new email: ");
                    String newEmail = scanner.nextLine();
                    System.out.print("Enter new phone: ");
                    String newPhone = scanner.nextLine();
                    controller.updateStudent(updateId, newName, newEmail, newPhone);
                    break;
                case 5:
                    System.out.print("Enter student ID to delete: ");
                    int deleteId = scanner.nextInt();
                    controller.deleteStudent(deleteId);
                    break;
                case 6:
                    System.out.println("Exiting system...");
                    DatabaseUtil.closeConnection();
                    scanner.close();
                    System.exit(0);
                default:
                    System.out.println("Invalid choice. Please try again.");
            }
        }
    }
}
第四步:数据库准备
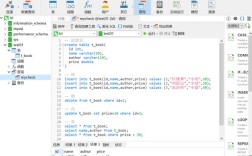
在你的 MySQL 数据库中,执行以下 SQL 语句来创建 student_db 数据库和 students 表。
-- 创建数据库
CREATE DATABASE IF NOT EXISTS student_db;
-- 使用数据库
USE student_db;
-- 创建学生表
CREATE TABLE IF NOT EXISTS students (
    id INT AUTO_INCREMENT PRIMARY KEY,
    name VARCHAR(100) NOT NULL,
    email VARCHAR(100) NOT NULL UNIQUE,
    phone VARCHAR(20) NOT NULL
);
第五步:运行系统
- 确保你的 MySQL 服务正在运行,
db.properties文件中的连接信息正确。 - 在你的 IDE (如 IntelliJ IDEA) 中,找到
App.java文件。 - 右键点击
App.java,选择 "Run 'App.main()'"。 - 现在你可以通过控制台与你的学生管理系统进行交互了。
这个项目为你提供了一个完整的、基于 MVC 架构的 Java + MySQL 管理系统模板。
优点:
- 结构清晰: 代码分层,职责明确,易于维护和扩展。
- 可复用性:
DatabaseUtil和StudentRepository可以被其他部分复用。 - 安全性: 使用
PreparedStatement有效防止 SQL 注入攻击。
可以进一步改进的方向:
- 图形用户界面 (GUI): 使用 JavaFX 或 Swing 替换控制台交互,提供更友好的用户体验。
- 日志框架: 集成 Log4j 或 SLF4J 来记录系统运行日志,而不是简单地打印到控制台。
- 连接池: 使用 HikariCP 等连接池来管理数据库连接,提高性能和稳定性。
- 异常处理: 定义更具体的自定义异常,使错误处理更加精细。
- 单元测试: 为
StudentRepository和StudentController编写 JUnit 测试用例,确保代码质量。