Of course! The imagefilter module in Python is a powerful tool for applying various filters to images. It's part of the Pillow library (PIL), which is the modern, maintained fork of the Python Imaging Library (PIL).
This guide will walk you through everything you need to know about ImageFilter, from basic usage to common examples and a look at custom filters.
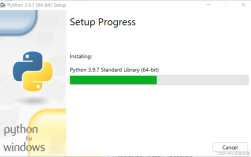
Installation
First, you need to have the Pillow library installed. If you don't, open your terminal or command prompt and run:
pip install Pillow
Basic Usage
The core idea is to create an ImageFilter object and then apply it to an image using the filter() method of a Pillow Image object.
Here's the general workflow:
- Import the necessary modules:
ImageandImageFilterfromPIL. - Open an image file.
- Create a filter object (e.g.,
ImageFilter.BLUR). - Apply the filter to the image using
image.filter(). - Save the result to a new file.
from PIL import Image, ImageFilter
# 1. Open an image
try:
    original_image = Image.open("path/to/your/image.jpg")
except FileNotFoundError:
    print("Error: Image file not found. Please replace 'path/to/your/image.jpg' with a valid path.")
    exit()
# 2. Create a filter object
blur_filter = ImageFilter.BLUR
# 3. Apply the filter
blurred_image = original_image.filter(blur_filter)
# 4. Save the result
blurred_image.save("blurred_image.jpg")
print("Image filtered and saved as 'blurred_image.jpg'")
Common Built-in Filters
Pillow comes with a set of predefined, easy-to-use filters.
A. Blur Filters
ImageFilter.BLUR: A simple, uniform blur.ImageFilter.GaussianBlur: A more natural-looking blur using a Gaussian function. You can specify the radius of the blur.
from PIL import Image, ImageFilter
image = Image.open("input.jpg")
# Simple blur
blurred = image.filter(ImageFilter.BLUR)
blurred.save("simple_blur.jpg")
# Gaussian blur with a radius of 5
gaussian_blurred = image.filter(ImageFilter.GaussianBlur(radius=5))
gaussian_blurred.save("gaussian_blur.jpg")
B. Sharpening
ImageFilter.SHARPEN: Enhances the edges and details in an image.
from PIL import Image, ImageFilter
image = Image.open("input.jpg")
sharpened_image = image.filter(ImageFilter.SHARPEN)
sharpened_image.save("sharpened_image.jpg")
C. Edge Detection
ImageFilter.FIND_EDGES: Highlights the edges in an image. This is often used in computer vision tasks.ImageFilter.EDGE_ENHANCE: A less aggressive edge detection that enhances existing edges.
from PIL import Image, ImageFilter
image = Image.open("input.jpg")
edges = image.filter(ImageFilter.FIND_EDGES)
edges.save("edges.jpg")
enhanced_edges = image.filter(ImageFilter.EDGE_ENHANCE)
enhanced_edges.save("enhanced_edges.jpg")
D. Smoothing
ImageFilter.SMOOTH: Smooths the image, reducing noise.ImageFilter.SMOOTH_MORE: A more aggressive smoothing filter.
from PIL import Image, ImageFilter
image = Image.open("input.jpg")
smoothed_image = image.filter(ImageFilter.SMOOTH)
smoothed_image.save("smoothed_image.jpg")
Custom Kernels (The Real Power)
The most powerful feature of ImageFilter is the ability to define your own custom convolution kernels. A kernel is a small matrix that is "slided" over every pixel of the image to calculate a new value.
You can create custom filters using ImageFilter.Kernel() or ImageFilter.CustomFilter().
ImageFilter.Kernel()
This is for simple, separable kernels. It takes the following arguments:
size: A tuple(width, height)of the kernel.kernel: A sequence of floats representing the kernel values.scale(optional): The value to divide the sum of the kernel by. If0, it's calculated automatically.offset(optional): A value to add to the result after scaling.
Example: Emboss Effect
An emboss effect can be created with a specific kernel.
from PIL import Image, ImageFilter
image = Image.open("input.jpg").convert("L") # Convert to grayscale for a cleaner effect
# Define the emboss kernel
# The values in the kernel highlight changes in intensity.
emboss_kernel = ImageFilter.Kernel(
    size=(3, 3),
    kernel=[-2, -1, 0,
            -1,  1, 1,
             0,  1, 2],
    scale=1,
    offset=128  # Add 128 to make mid-tones gray
)
embossed_image = image.filter(emboss_kernel)
embossed_image.save("embossed_image.jpg")
ImageFilter.CustomFilter()
This is for more complex, non-separable kernels. You define a class that implements the filter method, which gives you full control over the convolution process.
Example: Simple Edge Detection with CustomFilter
This example manually implements a simple edge detection filter.
from PIL import Image, ImageFilter
class EdgeDetectionFilter(ImageFilter.BuiltinFilter):
    name = "EdgeDetection"
    # The kernel for a simple edge detector
    # This kernel detects horizontal edges.
    filterargs = (3, 3), 0, 0, (
        -1, -1, -1,
         0,  0,  0,
         1,  1,  1
    )
image = Image.open("input.jpg")
# Create an instance of our custom filter
edge_filter = EdgeDetectionFilter()
# Apply the filter
edge_detected_image = image.filter(edge_filter)
edge_detected_image.save("custom_edge_detected.jpg")
Complete Example: A Filter Script
Here's a more complete script that lets you apply different filters to an image from the command line.
import argparse
from PIL import Image, ImageFilter
def apply_filter(image_path, filter_type, output_path, radius=2):
    """
    Applies a specified filter to an image and saves it.
    """
    try:
        img = Image.open(image_path)
    except FileNotFoundError:
        print(f"Error: The file '{image_path}' was not found.")
        return
    except Exception as e:
        print(f"An error occurred opening the image: {e}")
        return
    print(f"Applying '{filter_type}' filter to '{image_path}'...")
    if filter_type == "blur":
        filtered_img = img.filter(ImageFilter.BLUR)
    elif filter_type == "gaussian_blur":
        filtered_img = img.filter(ImageFilter.GaussianBlur(radius=radius))
    elif filter_type == "sharpen":
        filtered_img = img.filter(ImageFilter.SHARPEN)
    elif filter_type == "edges":
        filtered_img = img.filter(ImageFilter.FIND_EDGES)
    elif filter_type == "emboss":
        # Using the Kernel from the previous example
        emboss_kernel = ImageFilter.Kernel(
            size=(3, 3), kernel=[-2, -1, 0, -1, 1, 1, 0, 1, 2], scale=1, offset=128
        )
        filtered_img = img.filter(emboss_kernel)
    else:
        print(f"Error: Unknown filter '{filter_type}'.")
        return
    try:
        filtered_img.save(output_path)
        print(f"Success! Filtered image saved as '{output_path}'.")
    except Exception as e:
        print(f"An error occurred saving the image: {e}")
if __name__ == "__main__":
    parser = argparse.ArgumentParser(description="Apply filters to an image using Pillow.")
    parser.add_argument("input_image", help="Path to the input image file.")
    parser.add_argument("filter_type", choices=["blur", "gaussian_blur", "sharpen", "edges", "emboss"],
                        help="The filter to apply.")
    parser.add_argument("output_image", help="Path to save the filtered image.")
    parser.add_argument("--radius", type=int, default=2,
                        help="Radius for the Gaussian blur (default: 2).")
    args = parser.parse_args()
    apply_filter(args.input_image, args.filter_type, args.output_image, args.radius)
How to run the script:
python my_filter_script.py path/to/your/image.jpg gaussian_blur output.jpg --radius 5
This will apply a Gaussian blur with a radius of 5 and save the result as output.jpg.