Of course! Here is a comprehensive guide to creating a powerful .vimrc file for Python development on Linux. This guide will cover everything from the essential basics to more advanced features, with explanations for each line.

The Goal
We'll build a .vimrc that provides:
- Code Completion: Intelligent suggestions using LSP (Language Server Protocol).
- Linting & Error Checking: Real-time feedback on syntax and style errors.
- Code Formatting: Automatically format your code to be clean and consistent.
- Productivity: A clean interface, easy navigation, and powerful shortcuts.
- Visual Feedback: Clear highlighting for syntax, errors, and special characters.
Step 1: The Foundation - Your .vimrc File
Your Vim configuration file is located at ~/.vimrc. If it doesn't exist, create it:
touch ~/.vimrc
Now, let's build it section by section.
Step 2: The Basic .vimrc Structure
We'll organize our .vimrc into logical sections for clarity.

" =============================================================================
" General Settings
" =============================================================================
" Set the leader key. This is a universal shortcut for personal mappings.
let mapleader = " "
" Enable line numbers
set number
" Enable relative line numbers for easier movement
set relativenumber
" Show which line your cursor is on
set cursorline
" Set the default file encoding to UTF-8
set encoding=utf-8
" Enable syntax highlighting
syntax on
" Set the default filetype to detect (enables filetype-specific plugins)
filetype plugin indent on
" Enable searching as you type, but highlight matches
set hlsearch
set incsearch
" Ignore case in searches unless a capital letter is used
set ignorecase
set smartcase
" Don't save backup files, use a swapfile instead
set nobackup
set noswapfile
" Better command-line completion
set wildmenu
" Show a status line at the bottom
set laststatus=2
" Set a nice color scheme
colorscheme gruvbox
set background=dark " or light, depending on your preference
" =============================================================================
" Plugin Manager (vim-plug)
" =============================================================================
" Install vim-plug if it's not already there
if empty(glob('~/.vim/autoload/plug.vim'))
  silent !curl -fLo ~/.vim/autoload/plug.vim --create-dirs
    \ https://raw.githubusercontent.com/junegunn/vim-plug/master/plug.vim
  autocmd VimEnter * PlugInstall --sync | source $MYVIMRC
endif
" Specify a directory for plugins
call plug#begin('~/.vim/plugged')
" --- Core Plugins for Python Development ---
" Language Server Protocol (LSP) client
Plug 'neoclide/coc.nvim', {'branch': 'release'}
" Fuzzy file finder, buffer switcher, etc.
Plug 'junegunn/fzf', { 'do': { -> fzf#install() } }
Plug 'junegunn/fzf.vim'
" A file explorer tree
Plug 'preservim/nerdtree'
" Git integration
Plug 'tpope/vim-fugitive'
" --- Code Quality & Formatting ---
" A prettier way to see diffs
Plug 'airblade/vim-gitgutter'
" Auto-close pairs like quotes, brackets, etc.
Plug 'jiangmiao/auto-pairs'
" Comment toggler
Plug 'tpope/vim-commentary'
" Status bar
Plug 'itchyny/lightline.vim'
" Code formatter
Plug 'Chiel92/vim-autoformat'
" Colorizer for hex codes, etc.
Plug 'chrisbra/Colorizer'
" End plugin specifications
call plug#end()
" =============================================================================
" Plugin-Specific Mappings and Settings
" =============================================================================
" --- coc.nvim (LSP) ---
" Use tab for trigger completion with characters ahead and navigate.
" NOTE: Use command ':verbose imap <tab>' to make sure tab is not mapped by
" other plugins before putting this into your config.
inoremap <silent><expr> <TAB>
      \ coc#pum#visible() ? coc#pum#next(1) :
      \ CheckBackspace() ? "\<TAB>" :
      \ coc#refresh()
inoremap <expr><S-TAB> coc#pum#visible() ? coc#pum#prev(1) : "\<C-h>"
" Make <CR> to accept selected completion item or notify coc.nvim to format
" <C-g>u breaks current undo, please don't use it.
inoremap <silent><expr> <CR> coc#pum#visible() ? coc#confirm() : "\<CR>"
" Use `[g` and `]g` to navigate diagnostics
nmap <silent> [g <Plug>(coc-diagnostic-prev)
nmap <silent> ]g <Plug>(coc-diagnostic-next)
" GoTo code navigation.
nmap <silent> gd <Plug>(coc-definition)
nmap <silent> gy <Plug>(coc-type-definition)
nmap <silent> gi <Plug>(coc-implementation)
nmap <silent> gr <Plug>(coc-references)
" Symbol renaming.
nmap <leader>rn <Plug>(coc-rename)
" Formatting selected code.
xmap <leader>f  <Plug>(coc-format-selected)
nmap <leader>f  <Plug>(coc-format-selected)
" Add `:Format` command to format current buffer.
command! -nargs=0 Format :call CocAction('format')
" --- NERDTree ---
" Open NERDTree with <leader>n
nnoremap <leader>n :NERDTreeToggle<CR>
" Close vim if NERDTree is the only window left
autocmd bufenter * if (winnr("$") == 1 && exists("b:NERDTree") && b:NERDTree.isTabTree()) | q | endif
" --- FZF ---
" Open FZF file search with <leader>f
nnoremap <leader>f :Files<CR>
" Open FZF buffer search with <leader>b
nnoremap <leader>b :Buffers<CR>
" --- vim-fugitive (Git) ---
" Show git status
nnoremap <leader>gs :Git<CR>
" Diff current file against HEAD
nnoremap <leader>gd :Gdiff<CR>
" --- vim-autoformat ---
" Enable autoformatting on save for Python
autocmd BufWritePre *.py Autoformat
" =============================================================================
" Python-Specific Settings
" =============================================================================
" Set the Python interpreter path (optional, but good for consistency)
" let g:python_host_prog = '/usr/bin/python3'
" let g:python3_host_prog = '/usr/bin/python3'
" Set the default indentation for Python
autocmd FileType python setlocal expandtab tabstop=4 shiftwidth=4 softtabstop=4
" =============================================================================
" Custom Key Mappings
" =============================================================================
" Save and quit quickly
nnoremap <leader>w :w<CR>
nnoremap <leader>q :q<CR>
nnoremap <leader>wq :wq<CR>
" Clear search highlighting
nnoremap <leader>/ :nohlsearch<CR>
" Open new splits in more intuitive directions
set splitbelow
set splitright
" Navigate between splits
nnoremap <C-h> <C-w>h
nnoremap <C-j> <C-w>j
nnoremap <C-k> <C-w>k
nnoremap <C-l> <C-w>l
Step 3: Installation and Setup
Now, let's get this working.
Install Prerequisites
First, you need Vim and a few essential tools on your Linux system.
# For Debian/Ubuntu
sudo apt update
sudo apt install vim python3-pip git fzf
# For Fedora/CentOS/RHEL
sudo dnf install vim python3-pip git fzf
# For Arch Linux
sudo pacman -S vim python-pip git fzf
Install Python Linters and Formatters
coc.nvim uses external tools for its magic. You need to install them using pip.
# Install the language server for Python
pip install 'python-lsp-server[all]'
# Install formatters and linters
pip install black autopep8 flake8
Install Vim Plugins
-
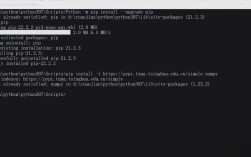
Open Vim:
 (图片来源网络,侵删)
vim
-
Run the command
PlugInstall. This will read your.vimrcand automatically download and install all the plugins listed. -
Once it's done, close Vim and reopen it to ensure everything loads correctly.
Configure coc.nvim for Python
This is the most important step for a great Python experience.
-
Open (or create) the Coc configuration file:
vim ~/.config/coc/coc-settings.json
If the directory doesn't exist, create it first.
-
Paste the following JSON configuration into the file. This tells
coc.nvimto use the tools we just installed.{ "python.linting.enabled": true, "python.linting.pylintEnabled": true, "python.linting.flake8Enabled": true, "python.linting.banditEnabled": false, "python.linting.mypyEnabled": true, "python.linting.pylintArgs": ["--load-plugins=pylint_django"], // Optional "python.formatting.provider": "black", "python.formatting.blackPath": "black", "python.formatting.autopep8Path": "autopep8", "python.formatting.yapfPath": "yapf", "python.analysis.typeCheckingMode": "basic", "python.analysis.diagnosticMode": "workspace" }"python.formatting.provider": "black": We're tellingcocto useblackfor code formatting. You can change this to"autopep8"if you prefer."python.linting...": These enable various linters to catch style and potential errors in your code.
Step 4: How to Use Your New Vim Environment
Here's a quick cheat sheet for your new setup.
| Action | Vim Command / Shortcut |
|---|---|
| File Navigation | |
| Open Fuzzy File Finder | <leader>f |
| Open Fuzzy Buffer Switcher | <leader>b |
| Toggle File Tree (NERDTree) | <leader>n |
| Code Editing | |
| Go to Definition of a function/class | gd (with cursor on the name) |
| Find all References to a symbol | gr |
| Rename a Symbol | <leader>rn |
| Format the current file | Format or <leader>f |
| Toggle a comment | gcc (on a line) or gc in visual mode |
| Git | |
| See Git Status | <leader>gs |
| See Diff against HEAD | <leader>gd |
| General Vim | |
| Save | <leader>w |
| Quit | <leader>q |
| Save and Quit | <leader>wq |
| Clear search highlights | <leader>/ |
| Move between splits (left, down, up, right) | <C-h>, <C-j>, <C-k>, <C-l> |
Troubleshooting
-
LSP/Completion isn't working:
- Check
~/.config/coc/coc-settings.jsonfor typos. - Run
CocInfoin Vim. Look for any errors in the "Log" section. - Ensure
python-lsp-serverand your chosen formatter/linter are installed in your Python environment (pip list).
- Check
-
Plugins aren't loading:
- Make sure you ran
PlugInstallinside Vim. - Check that your
call plug#begin(...)andcall plug#end()lines are correctly placed in your.vimrc.
- Make sure you ran
-
Key mappings don't work:
- Ensure the
let mapleader = " "line is near the top of your.vimrc. - Check for conflicting mappings with
verbose map <your-key>.
- Ensure the
This .vimrc provides a rock-solid foundation for Python development in Vim on Linux. You can now customize it further by adding more plugins or tweaking the settings to perfectly fit your workflow. Happy coding