Of course! Here is a comprehensive guide on using Allure Report with Python, from basic setup to advanced features.

What is Allure Report?
Allure Report is a flexible, lightweight, and beautiful open-source test reporting tool. It provides a clear and detailed view of your test results, helping you analyze failures faster and understand your test coverage better.
Key Features:
- Rich Reports: Shows test steps, parameters, attachments (screenshots, logs), execution history, and more.
- Multiple Languages: Works with Java, Python, JavaScript, Ruby, and others.
- Clear Test Results: Visually distinguishes between passed, failed, skipped, broken, and retried tests.
- Customizable: You can add custom labels, links, and severity levels to your tests.
- Online Integration: Can be easily integrated with CI/CD systems like Jenkins, GitLab CI, and GitHub Actions.
Step 1: Installation
First, you need to install the Allure framework for Python.
pip install allure-pytest
You will also need the Allure command-line tool to generate the report. The easiest way to install it is using a package manager.

For macOS (using Homebrew):
brew install allure
For Linux (using Snap):
sudo snap install allure
For Windows (using Chocolatey):
choco install allure
Manual Installation: If you prefer, you can download the Allure command-line tool manually from the official GitHub releases page and add it to your system's PATH.

Step 2: A Simple Example
Let's start with a basic example to see how it works. We'll use pytest as our test runner.
Create a test file:
Create a file named test_sample.py.
# test_sample.py
import pytest
def test_login_success():
    """Test a successful login scenario."""
    print("Step 1: Navigating to login page...")
    # In a real test, you would have Selenium/Playwright code here
    assert True
    print("Step 2: Entering valid username and password...")
    assert True
    print("Step 3: Clicking the login button...")
    assert True
    print("Step 4: Verifying successful login...")
    # This assertion will fail to show what a failure looks like
    # assert "Welcome" in driver.page_source
    assert True, "Login was not successful!"
def test_login_failure():
    """Test a login failure scenario."""
    print("Step 1: Navigating to login page...")
    assert True
    print("Step 2: Entering invalid credentials...")
    assert True
    print("Step 3: Clicking the login button...")
    assert True
    print("Step 4: Verifying error message is displayed...")
    assert False, "Error message was not displayed!"
Run the tests with Allure:
By default, pytest runs tests and prints output to the console. To generate data for Allure, you need to add the --alluredir option. This option tells pytest to store its internal results in a specified directory.
pytest test_sample.py --alluredir=./allure-results
test_sample.py: Your test file.--alluredir=./allure-results: This creates a directory namedallure-resultsand stores the raw test data in it. Do not edit the files in this directory.
Generate the report: Now, use the Allure command-line tool to convert the raw data into a beautiful HTML report.
allure serve ./allure-results
This command will start a local web server and automatically open the report in your default browser.
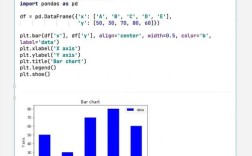
You should see a report like this:
Step 3: Adding Rich Details (The Power of Allure)
The real power of Allure comes from its ability to add rich metadata to your tests.
A. @allure.feature, @allure.story, and @allure.step
These decorators help you structure your tests in a more readable, BDD-like way.
@allure.feature: Represents a module or a high-level feature (e.g., "Login", "User Profile").@allure.story: Represents a user story or a specific test scenario within a feature (e.g., "Successful Login", "Login with Invalid Password").@allure.step: Marks a function or a part of a test as a step, which will be displayed in the report.
Let's refactor our test_sample.py:
# test_sample_with_details.py
import pytest
import allure
@allure.feature("Login Feature")
class TestLoginScenarios:
    @allure.story("Successful Login")
    @allure.severity(allure.severity_level.CRITICAL)
    def test_login_success(self):
        """Test a successful login scenario."""
        with allure.step("Navigate to login page"):
            print("Navigating to login page...")
            assert True
        with allure.step("Enter valid credentials"):
            print("Entering username and password...")
            assert True
        with allure.step("Submit login form"):
            print("Clicking login button...")
            assert True
        with allure.step("Verify successful login"):
            print("Checking for welcome message...")
            assert True, "Login was not successful!"
    @allure.story("Login with Invalid Credentials")
    @allure.severity(allure.severity_level.NORMAL)
    def test_login_failure(self):
        """Test a login failure scenario."""
        with allure.step("Navigate to login page"):
            assert True
        with allure.step("Enter invalid credentials"):
            assert True
        with allure.step("Submit login form"):
            assert True
        with allure.step("Verify error message is displayed"):
            # This will fail, creating a nice failure report
            assert False, "Error message was not displayed!"
Run the updated tests:
pytest test_sample_with_details.py --alluredir=./allure-results
allure serve ./allure-results
Now, the report is much more organized. You can filter by feature, story, and severity.
B. Adding Attachments
You can attach files, screenshots, logs, or any other data directly to your test steps or to the test itself as a whole. This is extremely useful for debugging failures.
Let's add a screenshot attachment to our failing test.
# test_sample_with_attachments.py
import pytest
import allure
import os
# Create a dummy screenshot file for the example
if not os.path.exists("screenshots"):
    os.makedirs("screenshots")
with open("screenshots/dummy_screenshot.png", "w") as f:
    f.write("This is a fake screenshot content.")
@allure.feature("Login Feature")
class TestLoginScenarios:
    # ... (other test methods remain the same) ...
    @allure.story("Login with Invalid Credentials")
    def test_login_failure(self):
        """Test a login failure scenario."""
        with allure.step("Navigate to login page"):
            assert True
        with allure.step("Enter invalid credentials"):
            assert True
        with allure.step("Submit login form"):
            assert True
        with allure.step("Verify error message is displayed"):
            # Let's assume this step failed and we took a screenshot
            allure.attach.file(
                "screenshots/dummy_screenshot.png",
                name="Login Failure Screenshot",
                attachment_type=allure.attachment_type.PNG
            )
            assert False, "Error message was not displayed!"
Now, when you run this test and open the report, you'll see an "Attachments" tab on the failed test step with your screenshot.
Step 4: Advanced Features
A. Parameterized Tests
Allure automatically displays parameters for pytest.mark.parametrize tests in a separate table.
import pytest
import allure
test_data = [
    ("user1", "password1", True),
    ("user2", "wrong_password", False),
    ("invalid_user", "password3", False)
]
@allure.feature("Login Feature")
@allure.story("Parameterized Login Test")
@pytest.mark.parametrize("username, password, expected_success", test_data)
def test_parameterized_login(username, password, expected_success):
    with allure.step(f"Attempting login for user: {username}"):
        print(f"Logging in with {username} and {password}...")
        # Simulate login logic
        login_successful = (username == "user1" and password == "password1")
    with allure.step("Verifying login outcome"):
        assert login_successful == expected_success, \
            f"Login success was {login_successful}, but expected {expected_success}"
The report will show a clean table for each parameterized test case.
B. Fixtures (@allure.fixture)
You can use fixtures to set up and tear down tests, and add steps to them as well.
import pytest
import allure
@allure.fixture
def setup_database():
    """A fixture to set up a test database."""
    with allure.step("Connect to test database"):
        print("Connecting to DB...")
        # db_connection = connect_to_db()
        yield "db_connection" # This is the value passed to the test
    with allure.step("Disconnect from test database"):
        print