- 安装 Python 库
pytesseract:这是一个 Python 包,它作为 OCR(光学字符识别)引擎 Tesseract 的一个封装器。 - 安装 Tesseract OCR 引擎本身:
pytesseract只是一个接口,它需要调用底层的 Tesseract 程序才能工作,这个程序不是 Python 包,而是需要单独安装的可执行文件。
下面我将为你提供详细的、分步的安装指南,涵盖不同操作系统(Windows, macOS, Linux)以及一些常见问题的解决方案。

(图片来源网络,侵删)
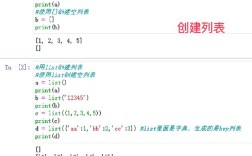
第一步:安装 Python 库 pytesseract
在你的终端或命令行工具中运行以下命令,推荐使用虚拟环境来管理项目依赖。
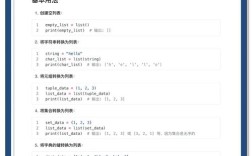
# 使用 pip 安装
pip install pytesseract
# 或者使用 pip3 (如果你有多个 Python 版本)
pip3 install pytesseract
第二步:安装 Tesseract OCR 引擎
这是最关键的一步,根据你的操作系统选择对应的安装方法。
Windows 系统安装
-
下载 Tesseract 安装程序
- 访问 Tesseract 的官方发布页面:https://github.com/UB-Mannheim/tesseract/wiki
- 在页面中找到 "Tesseract installer" 的下载链接,通常是一个
.exe文件。 - 重要:请下载与你系统位数匹配的版本(32位或64位),如果你不确定,64位通常是更安全的选择。
-
运行安装程序
 (图片来源网络,侵删)
- 双击运行下载的
.exe文件。 - 关键步骤:在安装过程中,务必勾选 "Add to PATH" 选项,这会让系统在任何位置都能找到
tesseract.exe文件,避免后续配置麻烦。 - 你也可以选择自定义安装路径,
C:\Program Files\Tesseract-OCR,但默认路径通常就很好。
- 双击运行下载的
-
验证安装
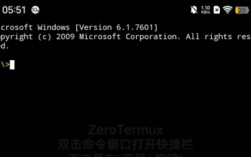
- 打开一个新的命令提示符或 PowerShell 窗口(必须重新打开,否则 PATH 不会更新)。
- 输入以下命令检查是否安装成功:
tesseract --version
- 如果成功,它会显示 Tesseract 的版本号和语言列表。
macOS 系统安装
使用 Homebrew 是最简单的方式。
-
安装 Homebrew (如果尚未安装) 打开终端,运行:
/bin/bash -c "$(curl -fsSL https://raw.githubusercontent.com/Homebrew/install/HEAD/install.sh)"
-
使用 Homebrew 安装 Tesseract
 (图片来源网络,侵删)
brew install tesseract
-
验证安装
tesseract --version
Linux 系统安装 (以 Ubuntu/Debian 为例)
使用系统的包管理器进行安装。
-
更新包列表并安装 Tesseract
# 更新包列表
sudo apt-get update
# 安装 Tesseract
sudo apt-get install tesseract-ocr
-
(可选) 安装语言包 Tesseract 默认只安装英文,如果你需要识别其他语言(如中文、法语等),需要安装对应的语言包。
- 安装英文和中文简体语言包:
sudo apt-get install tesseract-ocr-chi-sim tesseract-ocr-eng
- 你可以运行
apt-cache search tesseract-ocr来查看所有可用的语言包。
- 安装英文和中文简体语言包:
-
验证安装
tesseract --version
第三步:在 Python 代码中使用
环境已经配置好了,你可以在 Python 代码中测试 pytesseract。
-
安装 Pillow 库
pytesseract通常需要处理图像文件,而Pillow是 Python 中最常用的图像处理库,如果还没安装,请先安装它:pip install Pillow
-
编写测试代码
你需要一个图片文件来测试,假设你有一张名为
image.png的图片,里面包含文字。import pytesseract from PIL import Image # (可选) Tesseract 不在系统 PATH 中,你需要指定它的安装路径 # Windows 示例: # pytesseract.pytesseract.tesseract_cmd = r'C:\Program Files\Tesseract-OCR\tesseract.exe' # macOS 示例 (通过 Homebrew 安装的路径): # pytesseract.pytesseract.tesseract_cmd = '/opt/homebrew/bin/tesseract' # Apple Silicon Mac # pytesseract.pytesseract.tesseract_cmd = '/usr/local/bin/tesseract' # Intel Mac # Linux 示例 (通常在 /usr/bin/): # pytesseract.pytesseract.tesseract_cmd = '/usr/bin/tesseract' # 打开图片文件 # 确保你有一张名为 'image.png' 的图片在脚本同目录下 try: image = Image.open('image.png') except FileNotFoundError: print("错误:请确保 'image.png' 文件存在于当前目录。") exit() # 使用 pytesseract 进行 OCR 识别 # lang='chi_sim+eng' 表示同时识别中文简体和英文 text = pytesseract.image_to_string(image, lang='eng') # 打印识别结果 print("识别结果:") print(text)
常见问题与解决方案 (FAQ)
Q1: TesseractNotFoundError(tesseract not found) 错误
- 原因:Python 找不到
tesseract.exe或tesseract命令,这通常是因为 Tesseract 没有安装,或者没有正确添加到系统环境变量PATH中。 - 解决方案:
- Windows:确保你在安装 Tesseract 时勾选了 "Add to PATH",如果没勾选,可以手动将 Tesseract 的安装路径(
C:\Program Files\Tesseract-OCR)添加到系统环境变量PATH中,然后重启你的编辑器/终端。 - 通用解决方案:在 Python 代码中,通过
pytesseract.pytesseract.tesseract_cmd明确指定 Tesseract 可执行文件的完整路径,如上面的测试代码所示。
- Windows:确保你在安装 Tesseract 时勾选了 "Add to PATH",如果没勾选,可以手动将 Tesseract 的安装路径(
Q2: 识别率低,或者无法识别中文
- 原因:最常见的原因是没有安装对应语言的训练数据包,Tesseract 默认只包含英文。
- 解决方案:
- Windows:重新运行 Tesseract 安装程序,在 "Component to install" 部分,勾选你需要的语言(如
Chinese (Simplified))。 - macOS/Linux:使用包管理器安装对应语言包,如上文所述。
- 代码中指定语言:在
image_to_string函数中,使用lang参数指定语言代码。lang='eng':仅英文lang='chi_sim':仅中文简体lang='chi_sim+eng':中文简体和英文混合识别
- Windows:重新运行 Tesseract 安装程序,在 "Component to install" 部分,勾选你需要的语言(如
Q3: AttributeError: module 'PIL' has no attribute 'Image'
- 原因:这是一个经典的
Pillow库问题。Pillow是PIL(Python Imaging Library) 的一个分支,当你安装Pillow后,应该通过from PIL import Image来导入,而不是import Image。 - 解决方案:检查你的
import语句,确保是from PIL import Image。
按照以上步骤,你应该就能成功安装并使用 pytesseract 了,祝你编码愉快!