在 Python 中对音频进行重采样(Resample)通常需要将音频的采样率从一种值(如 44100 Hz)转换为另一种值(如 16000 Hz),以下是几种常用的方法,从简单到专业,涵盖不同场景和需求。

(图片来源网络,侵删)
方法 1:使用 librosa(推荐用于音频分析/机器学习)
librosa 是一个强大的音频处理库,常用于音乐信息检索(MIR)和机器学习任务,它内部使用高质量的重采样算法。
安装
pip install librosa
代码示例
import librosa
import soundfile as sf  # 用于保存音频
# 加载音频文件(librosa 会自动重采样为 22050 Hz,除非指定 sr)
audio_path = "input.wav"
y, original_sr = librosa.load(audio_path, sr=None)  # sr=None 保持原始采样率
# 目标采样率
target_sr = 16000
# 重采样
y_resampled = librosa.resample(y, orig_sr=original_sr, target_sr=target_sr)
# 保存重采样后的音频
sf.write("output_resampled.wav", y_resampled, target_sr)
print(f"原始采样率: {original_sr} Hz")
print(f"重采样后采样率: {target_sr} Hz")
特点
- 自动处理单声道/立体声。
- 使用高质量的插值算法(默认为
kaiser_best)。 - 适合需要高保真度的场景(如语音识别、音乐分析)。
方法 2:使用 scipy.signal(基于科学计算库)
scipy 提供了基础的信号处理功能,适合简单的重采样需求。
安装
pip install scipy numpy
代码示例
from scipy import signal
import soundfile as sf
# 加载音频
audio_path = "input.wav"
data, original_sr = sf.read(audio_path)
# 目标采样率
target_sr = 16000
# 计算重采样比例
resampling_ratio = original_sr / target_sr
# 重采样(scipy.signal.resample 会改变长度)
resampled_data = signal.resample(data, int(len(data) * resampling_ratio))
# 保存
sf.write("output_resampled.wav", resampled_data, target_sr)
print(f"原始采样率: {original_sr} Hz")
print(f"重采样后采样率: {target_sr} Hz")
特点
- 使用 FFT 进行重采样,可能引入频谱泄漏。
- 需要手动处理多声道(如立体声)。
- 适合快速实现,但质量可能不如
librosa。
方法 3:使用 pydub(简单易用,支持多种格式)
pydub 是一个高级音频处理库,适合简单的重采样和格式转换。
安装
pip install pydub
代码示例
from pydub import AudioSegment
# 加载音频(支持 MP3、WAV 等)
audio = AudioSegment.from_file("input.wav")
# 获取原始采样率
original_sr = audio.frame_rate
print(f"原始采样率: {original_sr} Hz")
# 重采样(改变采样率)
target_sr = 16000
audio_resampled = audio.set_frame_rate(target_sr)
# 保存(pydub 会自动处理编码)
audio_resampled.export("output_resampled.wav", format="wav")
print(f"重采样后采样率: {target_sr} Hz")
特点
- 支持多种格式(MP3、FLAC、WAV 等)。
- 操作简单,适合快速处理。
- 内部使用
ffmpeg,质量取决于ffmpeg的实现。
方法 4:使用 ffmpeg(命令行工具,质量最高)
如果对质量要求极高,可以直接调用 ffmpeg 进行重采样。

(图片来源网络,侵删)
安装
- 确保
ffmpeg已安装并添加到系统路径。
代码示例(通过 subprocess 调用)
import subprocess
input_file = "input.wav"
output_file = "output_resampled.wav"
target_sr = 16000
# 调用 ffmpeg 重采样
subprocess.run([
    "ffmpeg",
    "-i", input_file,
    "-ar", str(target_sr),  # 设置音频采样率
    "-acodec", "pcm_s16le",  # PCM 编码(WAV)
    output_file
])
print(f"已使用 ffmpeg 重采样到 {target_sr} Hz")
特点
- 使用
ffmpeg的高质量重采样算法(如soxr)。 - 适合生产环境或对质量要求极高的场景。
- 需要额外安装
ffmpeg。
总结与选择
| 方法 | 优点 | 缺点 | 适用场景 |
|---|---|---|---|
librosa |
高质量,易用,支持多声道 | 依赖 librosa 和 soundfile |
机器学习、音频分析 |
scipy |
基于科学计算,轻量 | 可能引入频谱泄漏,需手动处理多声道 | 快速简单实现 |
pydub |
支持多种格式,操作简单 | 依赖 ffmpeg,质量一般 |
快速格式转换和简单重采样 |
ffmpeg |
质量最高,生产级可靠 | 需要额外安装 ffmpeg |
对质量要求极高的场景 |
推荐选择:
- 如果是机器学习或音频分析,优先用
librosa。 - 如果是快速脚本或简单处理,用
pydub。 - 如果需要最高质量,直接用
ffmpeg。

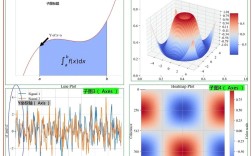
(图片来源网络,侵删)