Of course! Let's dive deep into PixelAccess in Python. This is a powerful but often overlooked feature from the Python Imaging Library (PIL), now maintained by the Pillow fork.

What is PixelAccess?
PixelAccess is a low-level object that provides direct, fast, and efficient access to the pixel data of an image. When you open an image with Pillow, you can get a PixelAccess object, which allows you to read and write individual pixels using simple [x, y] or (x, y) syntax.
Think of it like a 2D array where each element is a color value.
Why Use PixelAccess? (Pros and Cons)
✅ Pros:
- Extremely Fast: For pixel-by-pixel operations, it's significantly faster than using
image.getpixel()andimage.putpixel()in a loop. The overhead of calling a function for each pixel is eliminated. - Memory Efficient: It doesn't create a large new list or array of all pixel values in memory at once. It accesses pixels on demand.
- Simple Syntax: Once you have the object, accessing a pixel is as simple as
pixels[x, y].
❌ Cons:
- Low-Level & Brittle: It's not as "Pythonic" or high-level as other methods. It requires you to manage coordinates manually and can be slower for operations that can be vectorized.
- Slower than NumPy: For any serious numerical or matrix-based image manipulation, using NumPy is almost always faster and more convenient.
PixelAccessis great for simple tasks but gets outperformed by NumPy for complex ones. - Not All Formats: It's primarily available for common formats like "RGB", "RGBA", "L" (grayscale), etc. It may not be available for all image modes or compressed formats.
How to Get a PixelAccess Object
You use the load() method on a Pillow Image object.
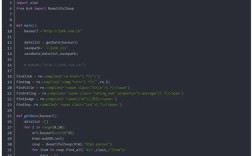
from PIL import Image
# 1. Open an image
image = Image.open("my_image.jpg")
# 2. Get the PixelAccess object
pixels = image.load()
# Now you can use the 'pixels' object
Practical Examples
Let's go through some common use cases.

Example 1: Reading Pixel Data
Let's get the color of a specific pixel.
from PIL import Image
# Create a simple 100x100 red image
img = Image.new('RGB', (100, 100), color='red')
# Load the pixel data
pixels = img.load()
# Get the color of the pixel at (x=50, y=50)
# Note: Coordinates are (x, y) or (column, row)
pixel_color = pixels[50, 50]
print(f"The color at (50, 50) is: {pixel_color}")
# Output:
# The color at (50, 50) is: (255, 0, 0)
Example 2: Modifying a Single Pixel
Let's change one pixel to blue.
from PIL import Image
# Create a simple 100x100 red image
img = Image.new('RGB', (100, 100), color='red')
pixels = img.load()
# Change the pixel at (25, 25) to blue
pixels[25, 25] = (0, 0, 255) # RGB for blue
# Save the modified image
img.save("modified_image.png")
# You can open "modified_image.png" to see a single blue dot in a red field.
Example 3: Iterating Over All Pixels (The Classic Use Case)
This is where PixelAccess really shines for simple transformations. Let's convert a color image to grayscale using a manual formula.
from PIL import Image
def convert_to_grayscale(image_path, output_path):
    """Converts an image to grayscale using PixelAccess."""
    try:
        img = Image.open(image_path)
        # Ensure the image is in RGB mode
        if img.mode != 'RGB':
            img = img.convert('RGB')
        pixels = img.load()
        width, height = img.size
        # Iterate over every pixel
        for y in range(height):
            for x in range(width):
                r, g, b = pixels[x, y]
                # Standard luminance formula for grayscale
                # We use integer division for speed
                gray = int(0.299 * r + 0.587 * g + 0.114 * b)
                # Set the new grayscale color
                pixels[x, y] = (gray, gray, gray)
        img.save(output_path)
        print(f"Image converted and saved to {output_path}")
    except FileNotFoundError:
        print(f"Error: The file {image_path} was not found.")
# Usage
convert_to_grayscale("my_image.jpg", "grayscale_image.png")
Example 4: Drawing a Simple Line
Let's draw a white diagonal line on a black background.

from PIL import Image
# Create a 200x200 black image
img = Image.new('RGB', (200, 200), color='black')
pixels = img.load()
width, height = img.size
# Draw a diagonal line from top-left to bottom-right
for i in range(width):
    # Make sure y coordinate is within bounds
    y = i if i < height else height - 1
    pixels[i, y] = (255, 255, 255) # White
img.save("line_image.png")
PixelAccess vs. getpixel()/putpixel() vs. NumPy
This is a crucial comparison for choosing the right tool.
| Method | Speed | Memory Usage | Use Case | Example |
|---|---|---|---|---|
PixelAccess |
Very Fast | Low | Simple, pixel-by-pixel loops where NumPy is overkill. | pixels = img.load(); pixels[x,y] = (r,g,b) |
getpixel()/putpixel() |
Very Slow | Low | Reading or writing one single pixel. Avoid in loops. | img.putpixel((x, y), (r, g, b)) |
| NumPy | Fastest (for vectorized ops) | Medium-High | Complex numerical operations, filtering, transformations, machine learning. | img_array = np.array(img); img_array[:, :, 0] = 0 |
The NumPy Alternative (Recommended for most tasks)
For almost any image processing task beyond a simple loop, converting the image to a NumPy array is the best practice.
import numpy as np
from PIL import Image
img = Image.open("my_image.jpg").convert("RGB")
img_array = np.array(img)
# Now you can use powerful NumPy operations
# For example, set all red pixels to zero
img_array[:, :, 0] = 0
# Convert back to an image and save
new_img = Image.fromarray(img_array)
new_img.save("no_red_channel.png")
This NumPy approach is not only faster for this kind of operation but also much more readable and expressive for anyone familiar with NumPy.
Summary
| Feature | Description |
|---|---|
| What it is | A low-level object for direct, fast pixel access. |
| How to get it | pixels = image.load() |
| Best for | Simple, iterative tasks like drawing basic shapes or applying a simple, non-vectorizable formula to each pixel. |
| Avoid for | Complex mathematical transformations (use NumPy) or when you only need to touch one or two pixels (use putpixel). |
| Key Takeaway | PixelAccess is a great tool to have in your toolbox for simple, direct pixel manipulation. However, for serious image processing, NumPy is the king. |