Of course! "Eclipse Java Web" is a common phrase that refers to using the Eclipse IDE for Java EE (now Jakarta EE) development, specifically for building web applications.

Let's break this down into a comprehensive guide covering the key concepts, tools, and a step-by-step tutorial.
What is "Eclipse Java Web"?
It's the process of creating web applications (like websites, REST APIs, or web services) using the Java programming language within the Eclipse Integrated Development Environment (IDE).
The "Web" part typically involves one or more of the following technologies:
- Servlets: Java classes that handle HTTP requests and generate responses. They are the foundation of Java web applications.
- JSP (JavaServer Pages): A technology for creating dynamic web content by embedding Java code into HTML pages.
- JSTL (JSP Standard Tag Library): Provides simple tags for common tasks like iteration, conditionals, and formatting, reducing the need for Java scriptlets in JSP.
- Web Frameworks: High-level frameworks that simplify web development by providing a structured way to handle requests, manage data, and build views. The most popular are:
- Spring Boot: The modern industry standard for building all types of Java applications, especially REST APIs and web services. It's incredibly popular and simplifies configuration immensely.
- Jakarta EE (formerly Java EE): The "traditional" platform for enterprise-grade web applications. It includes specifications like EJB, JPA, and JSF.
- RESTful Web Services: APIs that use HTTP methods (GET, POST, PUT, DELETE) to perform CRUD (Create, Read, Update, Delete) operations on data resources. These are the backbone of modern web and mobile applications.
Essential Prerequisites
Before you start, you need to install the following software:

-
Java Development Kit (JDK):
- You need a JDK to compile and run Java code.
- Download the latest LTS (Long-Term Support) version from Adoptium (Eclipse Temurin) or Oracle JDK.
- Important: Make sure you set the
JAVA_HOMEenvironment variable.
-
Eclipse IDE for Enterprise Java and Web Developers:
- This is the specific package of Eclipse that comes with all the necessary tools for web development (like a server adapter, JSP editor, etc.).
- Download it from the Eclipse Downloads page. Do not just download the "Eclipse for Java Developers" version, as it lacks web server integration.
- Unzip the downloaded file and run the
eclipse.exe(oreclipseon macOS/Linux).
Key Concepts & Terminology
- Project Type: In Eclipse, a Java web project is typically a "Dynamic Web Project". This project structure follows the standard Java EE web application layout.
- Web Application Archive (WAR): The final, deployable unit of a Java web application. It's a ZIP file containing your compiled classes, web pages (JSP, HTML), libraries (JARs), and configuration files (like
web.xml). web.xml: The Deployment Descriptor. It's an XML file that configures your web application for the server. It defines things like servlet mappings, welcome files, and filters. While modern frameworks like Spring Boot often make this file optional, it's still fundamental to understand.- Application Server / Web Server: This is the software that runs your web application. It listens for HTTP requests and passes them to your application's code.
- Examples: Apache Tomcat, WildFly, JBoss, Jetty.
- Eclipse makes it easy to integrate, configure, and deploy your application directly to a server.
Step-by-Step Tutorial: Creating a Simple "Hello World" Web App
This guide will walk you through creating a basic Servlet and accessing it via a web browser.
Step 1: Create a Dynamic Web Project
- Open Eclipse.
- Go to
File > New > Dynamic Web Project. - Project Name: Enter
HelloWebApp. - Target runtime: Click
New..., selectApache Tomcat vX.X, and clickNext. Choose your Tomcat installation directory (if you haven't installed it, you can download it from the Tomcat website and point Eclipse to it). ClickFinish. - Configuration: Select the latest Java EE version available (e.g.,
Java EE 8orJava EE 9). - Click
Finish.
Eclipse will create the project structure with key folders:

src/main/java: For your Java source code.src/main/webapp: For your web content (HTML, JSP, images).WebContent: (older versions of Eclipse) An alternative tosrc/main/webapp.WEB-INF: A special directory with restricted access. It contains yourweb.xmlandlibfolder for project-specific libraries.
Step 2: Create a Servlet
- Right-click on the
src/main/javafolder. - Go to
New > Servlet. - Package: Enter
com.example.hello. - Class name: Enter
HelloServlet. - Click
Finish.
Eclipse will generate a basic Servlet class. It will also automatically add a <servlet> and <servlet-mapping> entry to your WEB-INF/web.xml file.
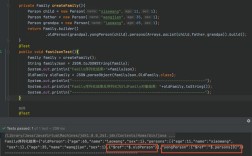
Your generated HelloServlet.java will look like this:
package com.example.hello;
import java.io.IOException;
import javax.servlet.ServletException;
import javax.servlet.annotation.WebServlet;
import javax.servlet.http.HttpServlet;
import javax.servlet.http.HttpServletRequest;
import javax.servlet.http.HttpServletResponse;
/**
 * Servlet implementation class HelloServlet
 */
@WebServlet("/HelloServlet") // This annotation also maps the servlet
public class HelloServlet extends HttpServlet {
    private static final long serialVersionUID = 1L;
    /**
     * @see HttpServlet#doGet(HttpServletRequest request, HttpServletResponse response)
     */
    protected void doGet(HttpServletRequest request, HttpServletResponse response) throws ServletException, IOException {
        // Set the content type of the response
        response.setContentType("text/html");
        // Get the writer to write the response
        java.io.PrintWriter out = response.getWriter();
        // Write HTML to the response
        out.println("<html><body>");
        out.println("<h1>Hello from a Java Servlet!</h1>");
        out.println("<p>This is my first web app in Eclipse.</p>");
        out.println("</body></html>");
    }
}
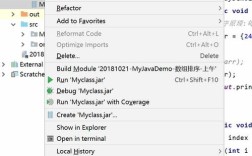
Step 3: Run the Application on a Server
- In the "Servers" view at the bottom of Eclipse (if you don't see it, go to
Window > Show View > Servers), you should see your Tomcat server. - Right-click on your
HelloWebAppproject in the "Project Explorer". - Go to
Run As > Run on Server. - Select your configured Tomcat server and click
Finish.
Eclipse will build your project, deploy the WAR file to Tomcat, and start the server. It will then open a web browser to the application's root URL.
Step 4: Access Your Servlet
The default URL for a dynamic web project is http://localhost:8080/<project-name>/.
To access your servlet, navigate to:
http://localhost:8080/HelloWebApp/HelloServlet
You should see the "Hello from a Java Servlet!" message in your browser.
Modern Development with Spring Boot
While the above example uses traditional servlets, most new Java web projects use Spring Boot. It dramatically simplifies development by:
- Embedding the Server: Spring Boot applications come with an embedded Tomcat (or Jetty) server. You don't need to configure a separate server in Eclipse.
- Simplifying Configuration: It uses "convention over configuration," meaning you rarely need to write
web.xmlor other complex XML files. - Starter Dependencies: It provides pre-configured "starter" dependencies (e.g.,
spring-boot-starter-web) that pull in all the necessary libraries for web development.
How to do Spring Boot in Eclipse:
-
Install the Spring Tools (STS) Extension:
- Go to
Help > Eclipse Marketplace.... - Search for "Spring Tools" and install it. This gives you wizards for creating Spring Boot projects.
- Go to
-
Create a Spring Boot Project:
- Go to
File > New > Spring Starter Project. - Fill in the project details (Name, Group, Artifact).
- On the "Dependencies" screen, add the
Spring Webdependency. This will give you everything you need to build a web app or REST API. - Click
Finish.
- Go to
-
Create a REST Controller:
- Spring Boot uses annotations to define web components. A
@RestControlleris similar to a@Servletbut much more powerful. - Create a new Java class, e.g.,
HelloController.java:
package com.example.hello; import org.springframework.web.bind.annotation.GetMapping; import org.springframework.web.bind.annotation.RestController; @RestController // This annotation marks the class as a web controller public class HelloController { @GetMapping("/hello") // Maps GET requests for "/hello" to this method public String sayHello() { return "Hello from a Spring Boot REST API!"; } } - Spring Boot uses annotations to define web components. A
-
Run the Application:
- Right-click on your project and select
Run As > Spring Boot App. - The embedded server will start. You can then open your browser and go to:
http://localhost:8080/hello - You will see the plain text response: "Hello from a Spring Boot REST API!".
- Right-click on your project and select
Summary
| Feature | Traditional (Servlet/JSP) | Modern (Spring Boot) |
|---|---|---|
| Project Type | Dynamic Web Project | Spring Boot Project |
| Server | External (e.g., Tomcat) | Embedded (e.g., Tomcat) |
| Configuration | web.xml, XML files |
Java annotations, application.properties |
| Core Component | @WebServlet |
@RestController, @Controller |
| Best For | Learning fundamentals, legacy systems, Jakarta EE applications | Rapid development, microservices, modern APIs |
For anyone starting today, Spring Boot is the recommended path for "Eclipse Java Web" development. However, understanding the traditional servlet model is crucial for appreciating how frameworks like Spring Boot work under the hood.