Of course! Here is a comprehensive guide covering the setup, usage, and deployment of Scrapy on a CentOS server. This guide is broken down into several parts:

- Prerequisites: What you need before you start.
- Part 1: Installing Python and Scrapy on CentOS: Step-by-step installation.
- Part 2: Creating and Running Your First Spider: A basic "Hello, World" for web scraping.
- Part 3: Advanced Scrapy Features: Best practices like using proxies, user-agents, and saving data.
- Part 4: Running Scrapy in Production: How to deploy your spider to run continuously on your CentOS server.
- Part 5: Common Issues and Solutions: Troubleshooting tips specific to CentOS.
Prerequisites
- A CentOS Server: This guide is primarily for CentOS 7 or CentOS Stream 8/9. You'll need SSH access to your server.
- Sudo Privileges: You'll need to be able to run commands with
sudo. - A Text Editor:
nano,vim, or any other editor you're comfortable with.
Part 1: Installing Python and Scrapy on CentOS
By default, CentOS comes with an older version of Python (e.g., Python 3.6 on CentOS 7). It's highly recommended to install a more modern version of Python to avoid compatibility issues.
Step 1: Update Your System
First, update all packages on your system to their latest versions.
sudo yum update -y
Step 2: Install EPEL Repository
The Extra Packages for Enterprise Linux (EPEL) repository contains many useful packages that are not in the default CentOS repositories.
sudo yum install epel-release -y
Step 3: Install Development Tools
You'll need a C compiler and other development tools to build some of Python's dependencies.

sudo yum groupinstall "Development Tools" -y
sudo yum install openssl-devel libffi-devel -y
Step 4: Install Python 3
We'll use yum to install Python 3.8 or newer. For CentOS 7, you might need to use the Software Collections (SCL) library to get a newer version. For CentOS 8/9, it's simpler.
For CentOS 7 (Recommended Method using SCL):
sudo yum install centos-release-scl -y
sudo yum install rh-python38 -y
For CentOS 8 / CentOS Stream 9:
sudo dnf install python3 python3-pip -y
Note: dnf is the modern package manager for CentOS 8/9, replacing yum.

Step 5: Verify Python Installation
Check the version of Python you just installed.
For CentOS 7 (using SCL):
You need to activate the SCL environment first. You can do this for your current session or enable it permanently. For the current session:
scl enable rh-python38 bash
Now, check the version:
python --version
# Should output Python 3.8.x
pip --version
# Should point to the python3.8 version of pip
For CentOS 8/9:
python3 --version
# Should output Python 3.6.x or newer
pip3 --version
Step 6: Install Scrapy
Now that you have a modern Python and pip, installing Scrapy is straightforward.
# If you are in the SCL environment (CentOS 7)
pip install scrapy
# Or if you are on CentOS 8/9
pip3 install scrapy
To verify the installation:
scrapy version
# Should output Scrapy 2.x.x
Part 2: Creating and Running Your First Spider
Let's create a simple Scrapy project to scrape quotes from http://quotes.toscrape.com/.
Step 1: Create a Scrapy Project
Navigate to the directory where you want to store your project and run the startproject command.
mkdir ~/scrapy_projects
cd ~/scrapy_projects
scrapy startproject quote_scraper
This will create a quote_scraper directory with the following structure:
quote_scraper/
├── scrapy.cfg          # deploy configuration file
└── quote_scraper/      # project's Python module, you'll import your code from here
    ├── __init__.py
    ├── items.py        # project items definition file
    ├── middlewares.py  # project middlewares file
    ├── pipelines.py    # project pipelines file
    ├── settings.py     # project settings file
    └── spiders/        # a directory where you'll put your spiders
        └── __init__.py
Step 2: Create a Spider
A spider is a class that defines how to follow links and extract data from the pages it visits.
Generate a new spider using the genspider command. We'll name it quotes and tell it to start on quotes.toscrape.com.
cd quote_scraper
scrapy genspider quotes quotes.toscrape.com
This will create a new file: quote_scraper/spiders/quotes.py.
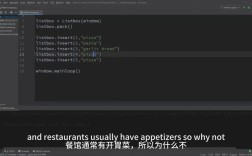
Open this file in your editor and replace its content with the following code:
# quote_scraper/spiders/quotes.py
import scrapy
class QuotesSpider(scrapy.Spider):
    name = 'quotes' # This is the name you'll use to run the spider
    allowed_domains = ['quotes.toscrape.com']
    start_urls = ['http://quotes.toscrape.com/']
    def parse(self, response):
        """
        This method is called for each response downloaded.
        It extracts the data we want.
        """
        # The CSS selector to find all quote containers on the page
        quotes = response.css('div.quote')
        for quote in quotes:
            # Extract data from each quote container
            yield {
                'text': quote.css('span.text::text').get(),
                'author': quote.css('small.author::text').get(),
                'tags': quote.css('div.tags a.tag::text').getall(),
            }
        # Follow the "Next" button to scrape the next page
        next_page = response.css('li.next a::attr(href)').get()
        if next_page is not None:
            yield response.follow(next_page, self.parse)
Step 3: Run the Spider
You can run your spider from the project's root directory (quote_scraper/).
scrapy crawl quotes
You should see the scraped data being printed to your terminal in JSON format. To stop the spider, press Ctrl+C.
Step 4: Save the Output
To save the scraped data to a file instead of printing it to the console, use the -o (or --output) flag. Scrapy supports multiple formats like JSON, CSV, and XML.
# Save to a JSON file
scrapy crawl quotes -o quotes.json
# Save to a CSV file
scrapy crawl quotes -o quotes.csv
A file named quotes.json or quotes.csv will be created in your quote_scraper directory.
Part 3: Advanced Scrapy Features
A. Using Proxies and User-Agents (to avoid being blocked)
It's good practice to rotate your user-agent and use proxies to prevent your IP from being blocked.
-
Set a User-Agent in
settings.py: Openquote_scraper/settings.pyand uncomment or add the following line:# settings.py USER_AGENT = 'Mozilla/5.0 (X11; Linux x86_64) AppleWebKit/537.36 (KHTML, like Gecko) Chrome/91.0.4472.124 Safari/537.36'
-
Use a Proxy Middleware: Scrapy has a built-in proxy middleware. You can configure it in
settings.py.# settings.py # Enable and configure the proxy middleware PROXY_LIST = [ 'http://user:pass@host1.port', 'http://host2.port', 'socks5://host3.port:1080', ] # Add to the DOWNLOADER_MIDDLEWARES setting DOWNLOADER_MIDDLEWARES = { 'scrapy.downloadermiddlewares.httpproxy.HttpProxyMiddleware': 110, # Your custom proxy middleware (if you write one) would go here }For a more robust solution, consider using a commercial proxy service and writing a custom middleware to rotate proxies from their API.
B. Using Item Pipelines for Data Processing
Pipelines are processing components that you can plug into your Scrapy spider. They are typically used to:
- Validate scraped data.
- Clean scraped data.
- Save data to a database (e.g., MySQL, PostgreSQL, MongoDB).
Example: Saving to a file with a custom pipeline
- Define an Item in
items.py: