Of course! This is a classic and powerful trio for Java web development. Let's break down what each component is, how they work together, and how to get started with them in Eclipse.

(图片来源网络,侵删)
The Three Components: A Quick Analogy
Imagine you're running a restaurant:
- Java: The language and recipes. It's the fundamental set of rules and instructions for creating dishes (your application logic).
- Tomcat: The kitchen and chef. It's a ready-to-use environment that takes your recipes (your compiled code), follows the instructions, and serves the final dishes (web pages) to customers (web browsers). It handles the "cooking" and "plating" without you needing to build the entire kitchen from scratch.
- Eclipse: The workstation and planning table. It's where you design your recipes, write them down, and organize all your ingredients and tools (your project files, code, and libraries). It helps you build and manage your application before it goes to the kitchen.
In-Depth Look at Each Component
Java
- What it is: A high-level, class-based, object-oriented programming language. It's platform-independent, meaning you can write code once and run it anywhere (the "Write Once, Run Anywhere" or WORA principle).
- Its Role: Java is the core programming language you will use to write the logic for your web application. This includes handling user requests, interacting with databases, processing data, and generating the content that will be sent back to the user's browser.
Tomcat
- What it is: An open-source web server and servlet container developed by Apache. It's often referred to as a "web container" or "application server" (though it's a lightweight one).
- Its Role: Tomcat's job is to execute Java-based web applications. Specifically, it:
- Listens for HTTP requests: It waits for web browsers to send requests to your application (e.g., by typing a URL in the address bar).
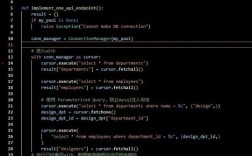
- Runs Servlets: Most Java web applications are built using Servlets. A servlet is a Java class that can dynamically respond to web requests. Tomcat loads these classes and runs their code.
- Manages the Lifecycle: It starts, runs, and stops your application within its own environment.
- Serves Static Content: It can also serve simple files like HTML, CSS, and images.
Eclipse
- What it is: A very popular, free, and open-source Integrated Development Environment (IDE).
- Its Role: Eclipse is your primary workspace for writing, organizing, and building your Java application. It provides:
- Code Editor: A powerful editor with features like syntax highlighting, code completion, and error checking.
- Project Management: Tools to structure your application into a standard format that Tomcat can understand.
- Integrated Build Tools: It can automatically compile your Java code into
.classfiles. - Debugging: A built-in debugger to find and fix errors in your code.
- Plugins: Crucially, Eclipse has plugins (like Eclipse for Enterprise Java and Web Developers) that allow you to easily integrate and manage servers like Tomcat.
How They Work Together: The Workflow
Here is the typical development cycle:
- Setup: You install the Java Development Kit (JDK), Eclipse IDE, and Tomcat.
- Create Project: In Eclipse, you create a "Dynamic Web Project." This sets up the correct folder structure required for a web application (e.g.,
src/javafor your code,WebContentfor HTML/CSS, etc.). - Write Code: You write your Java servlets and other Java classes inside the
srcfolder. You also create HTML pages, JSPs (JavaServer Pages), and other web resources in theWebContentfolder. - Configure Tomcat: You tell Eclipse where you installed Tomcat and add it as a "server runtime" to your project.
- Deploy and Run: You right-click on your project in Eclipse and choose "Run on Server." Eclipse does the following:
- It takes your compiled code and web content.
- It packages them into a WAR (Web Application Archive) file.
- It automatically deploys (copies) this WAR file to the Tomcat server.
- It starts the Tomcat server (if it's not already running).
- It opens a web browser to the correct URL for your application.
- Test: You interact with your application in the browser. If you make a change in your code, you can simply save it, and Eclipse will automatically re-deploy the updated application to Tomcat for you to test again.
Step-by-Step: Getting Started (A Practical Guide)
This guide assumes you are using a modern version of Eclipse (like 2025-12 or newer) and Java 11 or 17.
Step 1: Install Prerequisites
- Install the JDK: Download and install the Java Development Kit (JDK) from the official Oracle or Adoptium website. Make sure to set the
JAVA_HOMEenvironment variable. - Download Tomcat: Go to the Apache Tomcat website and download the "Core" zip file (e.g.,
apache-tomcat-9.0.85-windows-x64.zip). Do not unzip it yet. - Download Eclipse: Go to the Eclipse IDE for Enterprise Java and Web Developers download page and download the package for your operating system.
Step 2: Set Up Your Workspace
- Unzip the Eclipse archive into a folder (e.g.,
C:\eclipse). - Unzip the Tomcat archive into a folder (e.g.,
C:\apache-tomcat-9.0.85).
Step 3: Configure Tomcat in Eclipse
- Launch Eclipse.
- Go to
Window->Preferences(on macOS,Eclipse->Preferences). - Navigate to
Server->Runtime Environments. - Click
Add.... - Select your Apache Tomcat version (e.g.,
Apache Tomcat v9.0) and clickNext. - Browse to the Tomcat installation directory you unzipped in Step 2.
- Click
Finish. You have now told Eclipse about your Tomcat server.
Step 4: Create a Dynamic Web Project
- Go to
File->New->Dynamic Web Project. - Give your project a name (e.g.,
HelloWorldApp). - In the "Target runtime" dropdown, select the Apache Tomcat version you just configured.
- Ensure the "Configuration" is set to a suitable version (e.g.,
Apache Tomcat v9.0). - Click
Finish. Eclipse will create a project with the standard web structure.
Step 5: Create a Simple Servlet
-
In the
Project Exploreron the left, right-click on thesrcfolder and go toNew->Servlet. (图片来源网络,侵删)
 -
Give it a package name (e.g.,
com.example) and a class name (e.g.,HelloServlet). -
Click
Finish. -
Eclipse will generate a basic servlet. Modify the
doGetmethod to look like this:protected void doGet(HttpServletRequest request, HttpServletResponse response) throws ServletException, IOException { response.setContentType("text/html"); PrintWriter out = response.getWriter(); out.println("<h1>Hello, World from a Java Servlet!</h1>"); out.println("<p>This page was generated by Tomcat running a Java class created in Eclipse.</p>"); }
Step 6: Run Your Application
- In the
Project Explorer, right-click on your project (HelloWorldApp). - Go to
Run As->Run on Server. - Eclipse will ask you to select a server. Choose the Apache Tomcat server you configured and click
Finish. - Eclipse will start Tomcat, deploy your application, and open a web browser to
http://localhost:8080/HelloWorldApp/HelloServlet. - You should see your "Hello, World" message!
Modern Alternatives and Next Steps
While this "classic stack" is still very relevant, the ecosystem has evolved:

(图片来源网络,侵删)
- Maven/Gradle: These are build automation tools that are now standard. They manage your project's dependencies (like libraries for databases, JSON, etc.) and automate the build and packaging process. Eclipse has excellent support for both.
- Spring Boot: This is the modern standard for building Java web applications. Spring Boot simplifies configuration dramatically and includes an embedded web server (like Tomcat) directly inside your application. This means you don't need to manage a separate Tomcat installation. You just run your Java application as a standalone program. While it's different from the classic setup, understanding the relationship between Java, Tomcat, and Eclipse is