Of course! Using OpenCV in Python to apply gamma correction is a fundamental and very useful image processing technique. It's great for adjusting image brightness and contrast non-linearly.

Here's a complete guide, covering the theory, the code, and a practical interactive example.
What is Gamma Correction?
Gamma correction is a non-linear operation used to encode and decode luminance or tristimulus values in video or still image systems. In simpler terms, it's a way to adjust the brightness of an image.
The formula is:
O = I^(γ)
Where:

Iis the normalized input pixel intensity (a value between 0 and 1).- (gamma) is the correction factor.
Ois the normalized output pixel intensity.
How it works:
- If
γ < 1: The output image will be brighter than the input. This is called "gamma encoding" and is often used to correct for the fact that screens display images with a gamma of ~2.2. - If
γ > 1: The output image will be darker than the input. This is called "gamma decoding". - If
γ = 1: The output image is identical to the input.
The effect is most noticeable in the mid-tones of an image, while the pure blacks (0) and pure whites (1) remain unchanged.
The Core Python/NumPy Implementation
The key to gamma correction in Python is to use NumPy, not a slow Python loop. OpenCV images are essentially NumPy arrays, so we can leverage NumPy's power for fast, element-wise calculations.
Here is the core function. It's simple and reusable.

import numpy as np
import cv2
def adjust_gamma(image, gamma=1.0):
    """Build a lookup table mapping the pixel values [0, 255] to
    their adjusted gamma values.
    """
    # Build a lookup table mapping the pixel values [0, 255] to
    # their adjusted gamma values.
    inv_gamma = 1.0 / gamma
    table = np.array([((i / 255.0) ** inv_gamma) * 255
        for i in np.arange(0, 256)]).astype("uint8")
    # apply gamma correction using the lookup table
    return cv2.LUT(image, table)
Why use a Lookup Table (LUT)?
Instead of recalculating the gamma formula for every single pixel in the image every time, we pre-calculate the output value for every possible input value (0-255) and store it in a 256-element array called a lookup table. Then, we use cv2.LUT() to apply this table in a single, highly optimized operation. This is significantly faster than a manual loop.
Complete, Runnable Example
This script loads an image, applies three different gamma corrections (dark, normal, bright), and displays them all side-by-side.
Prerequisites:
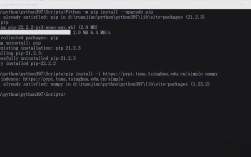
Make sure you have OpenCV installed:
pip install opencv-python numpy
Save this code as gamma_correction.py:
import cv2
import numpy as np
import argparse
def adjust_gamma(image, gamma=1.0):
    """Build a lookup table mapping the pixel values [0, 255] to
    their adjusted gamma values.
    """
    # Build a lookup table mapping the pixel values [0, 255] to
    # their adjusted gamma values.
    inv_gamma = 1.0 / gamma
    table = np.array([((i / 255.0) ** inv_gamma) * 255
        for i in np.arange(0, 256)]).astype("uint8")
    # apply gamma correction using the lookup table
    return cv2.LUT(image, table)
# Construct the argument parser and parse the arguments
ap = argparse.ArgumentParser()
ap.add_argument("-i", "--image", required=True,
    help="path to the input image")
args = vars(ap.parse_args())
# Load the original image
original_image = cv2.imread(args["image"])
# Check if the image was loaded successfully
if original_image is None:
    print(f"Error: Could not load image at {args['image']}")
    exit()
# Define three different gamma values to experiment with
gamma_values = [0.5, 1.0, 2.2]
# Create a list to store the resulting images
adjusted_images = []
# Loop over the gamma values and apply gamma correction
for v in gamma_values:
    # Apply gamma correction
    corrected_image = adjust_gamma(original_image, gamma=v)
    adjusted_images.append(corrected_image)
    # Create a window title for the image
    window_title = f"Gamma {v}"
    cv2.imshow(window_title, corrected_image)
# Wait for a key press to close all windows
cv2.waitKey(0)
# Destroy all OpenCV windows
cv2.destroyAllWindows()
How to Run:
- Get a sample image (e.g.,
my_image.jpg). - Run the script from your terminal:
python gamma_correction.py --image my_image.jpg
- Three windows will appear, showing the image with
gamma=0.5(brighter),gamma=1.0(original), andgamma=2.2(darker).
Interactive Gamma Correction with Trackbar
For a more practical and fun application, you can create a window with a trackbar that lets you adjust the gamma value in real-time.
This code is slightly more advanced as it requires a callback function for the trackbar.
import cv2
import numpy as np
# Global variable to store the current gamma value
gamma_value = 1.0
def update_gamma(new_gamma):
    """Callback function for the trackbar."""
    global gamma_value
    gamma_value = new_gamma / 10.0  # Scale the trackbar value (0-300) to (0.0-30.0)
    # Apply gamma correction using the core function
    adjusted_image = adjust_gamma(original_image, gamma=gamma_value)
    # Display the updated image
    cv2.imshow('Gamma Correction', adjusted_image)
# --- Core Gamma Function (same as before) ---
def adjust_gamma(image, gamma=1.0):
    inv_gamma = 1.0 / gamma
    table = np.array([((i / 255.0) ** inv_gamma) * 255
        for i in np.arange(0, 256)]).astype("uint8")
    return cv2.LUT(image, table)
# --- Main Script ---
if __name__ == '__main__':
    # Load the image
    image_path = 'my_image.jpg' # <-- CHANGE THIS TO YOUR IMAGE PATH
    original_image = cv2.imread(image_path)
    if original_image is None:
        print(f"Error: Could not load image at {image_path}")
        exit()
    # Create a window
    window_name = 'Gamma Correction'
    cv2.namedWindow(window_name)
    # Create a trackbar for gamma adjustment
    # cv2.createTrackbar(trackbar_name, window_name, initial_value, max_value, callback_function)
    cv2.createTrackbar('Gamma', window_name, 10, 300, update_gamma)
    # Initial display
    update_gamma(10) # Call it once to show the initial image (gamma=1.0)
    # Wait until the user presses a key
    print("Press any key to exit.")
    cv2.waitKey(0)
    # Clean up
    cv2.destroyAllWindows()
How to Run:
- Save this code as
interactive_gamma.py. - Make sure
my_image.jpgis in the same directory or change the path in the script. - Run it:
python interactive_gamma.py
- A window will appear with your image. Move the trackbar slider to see the brightness change in real-time. The value displayed next to the slider is
gamma * 10(so10meansgamma=1.0).